![[遊戲攻略] FFD 第 2 章 光之世界 龍騎士篇 (Chapter 2-1: World of Light – Dragoon)](https://www.hdlulu.com/wordpress/wp-content/uploads/2012/10/FFD_chapter2_01_dragon_knight.png "[遊戲攻略] FFD 第 2 章 光之世界 龍騎士篇 (Chapter 2-1: World of Light – Dragoon)")
Final Fantasy Dimensions / Legends
Walkthrough, Graphic Guide
– Chapter 2-1: World of Light – The Dragoon –
最終幻想維度 攻略
– 第 2 章 光之世界 龍騎士篇 –
本篇流程順序及重點摘要
( 點選連結可以直接跳至該段落 )
( 全文過長,可多利用段落中的 “返回頂部目錄” 來跳轉 )
This process sequence and Highlights:
(Click the link to jump)
(This post is too long. Click “Back to Top” for jumping)
–
–
(I’m from Taiwan, and I’m sorry about my poor English. I hope you guys can understand what I translated.)
–
(01) 布拉斯卡村 Braska
(02) 迪斯特洞窟 Cave to Deist
——–2.1 – 迪斯特洞窟 B1 – 1 Cave to Deist B1F-1
——–2.2 – 迪斯特洞窟 B2 – 1 Cave to Deist B2F-1
——–2.3 – 迪斯特洞窟 B3 ( 儲存點 ) Cave to Deist B3 (Save point)
——–2.4 – 迪斯特洞窟 B2 – 2 Cave to Deist B2F-2
——–2.5 – 迪斯特洞窟 B1 – 2 ( 儲存點 ) Cave to Deist B1F-2 (Save point)
————–強敵:奇美拉 ( 低機率掉落「紅色尾巴」 )
————–Enemy: Chimera (Drops Red Tail with low probability)
(03) 迪斯特鎮 Deist
———–事件:跟伊娃拿亞伯之槍、找理查對話
———–強敵:復仇哥布林 ( 寶箱:睡眠劍、護盾戒指 )
———–Event: Receive Abel’s Spear from Ebba, and dialogize with Ricard
———–Enemy: Avenger (Chests: Sleep Blade, Protect Bangle)
(04) 飛龍草叢生地 Dragonweed Gardens
—————BOSS 戰:小隊長x1、少尉x2
—————取得「飛龍草」
—————Boss battle: Lieutenant x1, Ensign x2
—————Receive “Dragon grass”
(05) 飛龍之谷 Dragon Valley
——–5.1 – 飛龍之谷 地圖1 Dragon Valley: Map 1
——–5.2 – 飛龍之谷 地圖2 Dragon Valley: Map 2
——–5.3 – 飛龍之谷 地圖3 Dragon Valley: Map 3
——–5.4 – 飛龍之谷 地圖4 Dragon Valley: Map 4
——–5.5 – 飛龍之谷 地圖5 ( 儲存點 ) Dragon Valley: Map 5 (Save point)
——–5.6 – 飛龍之谷 地圖6 ( 事件:芭芭拉 ) Dragon Valley: Map 6 (Event: Barbara)
——–5.7 – 飛龍之谷 地圖7 Dragon Valley: Map 7
(06) 飛龍棲息地 Dragon Roost
(07) 雷鳴洞窟 ( 劇情支線 ) Cave of Fulmination (Sub-Event)
——–7.1 – 雷鳴洞窟 B1 Cave of Fulmination B1F
——–7.2 – 雷鳴洞窟 B2 – 1 Cave of Fulmination B2F-1
——–7.3 – 雷鳴洞窟 B3 – 1 Cave of Fulmination B3F-1
——–7.4 – 雷鳴洞窟 B2 – 2 Cave of Fulmination B2F-2
——–7.5 – 雷鳴洞窟 B3 – 2 Cave of Fulmination B3F-2
——–7.6 – 雷鳴洞窟 B4 – 1 Cave of Fulmination B4F-1
——–7.7 – 雷鳴洞窟 B5 Cave of Fulmination B5F
——–7.8 – 雷鳴洞窟 B4 – 2 Cave of Fulmination B4F-2
——–7.9 – 雷鳴洞窟 B4 – 3 ( 儲存點、傳送點 ) Cave of Fulmination B4F-3 (Save point)
—————BOSS 戰:拉姆 (Boss Battle: Ramuh)
—————取得召喚魔法「拉姆」(Learned Sumoning Spell: Ramuh)
(08) 高風之塔 Highwind Tower
——事件:「芭芭拉」加入隊伍,4 JP 入手 (Event: Barbara joins your party, receive 4 JP)
——–8.1 – 高風之塔 1F Highwind Tower 1F
——–8.2 – 高風之塔 2F ( 外部:小事件 ) Highwind Tower 2F (Outside: Event)
——–8.3 – 高風之塔 3F Highwind Tower 3F
——–8.4 – 高風之塔 4F ( 外部:小事件 ) Highwind Tower 4F (Outside: Event)
——–8.5 – 高風之塔 5F ( 儲存點 ) Highwind Tower 5F (Save point)
——–8.6 – 高風之塔 6F ( 外部:小事件 ) Highwind Tower 6F (Outside: Event)
——–8.7 – 高風之塔 7F Highwind Tower 7F
——–8.8 – 高風之塔 8F ( 儲存點 ) Highwind Tower 8F (Save point)
——–8.9 – 高風之塔 頂層 Highwind Tower Top Floor
—————BOSS 戰:風之瓦塔
—————取得職業「龍騎士」、5 JP 入手
—————BOSS 戰:風之瓦塔 第二戰 ( 強制結束 )
—————Boss Battle: Vata of the Wind
—————Receive the Job: “Dragoon”, 5 JP
—————Boss Battle: Vata of Wind, Round 2 (Force Quit)
–
–
–
布拉斯卡村
Braska
本篇一開始來到了地圖上的「布拉斯卡村」,這時候各位的職業點數最大應該可以加到 8 了。別忘了先把 JP 加一加,免得在戰鬥時浪費了 AP。職業的選擇上除了前面推薦過的戰士、武僧、盜賊之外,其實我在這裡將原本選擇的黑魔改成了赤魔,原因有下面幾點:
Now we’re at Braska. The maximum of JLV is 8 now. Don’t forget upgrade it before normal battles. The proposed choice of Jobs is Warrior, Monk, and Thief. And I changed the Black Mage to Red Mage. The reason is:
1. 之前還有厄戈在,有人可以幫忙回復,現在厄戈沒了,仍然要有人擔任回復的角色。
2. 赤魔在 JLV20 的能力「連續魔法」在後期很威風也很必要,非提早進行不可。
3. 赤魔可以拿劍+盾,防禦性好很多。
4. 赤魔應該是這時期最方便習得融合技「魔法爆彈2」的 ( 救療 + 烈炎 ),目前很有用的技能。
1. We had Elgo in the party before, and he can help to restore. But now he is not here.
2. Red Mage’s ability: “Doublecast” is powerful and important. We should prepare for it earlier.
3. Red Mage can equip the blades and shields to increase attack and defense.
4. Red Mage can very easily learned a useful Fusion Ability (F-Ability): “Magic Bomb 2” (Cura + Fira).
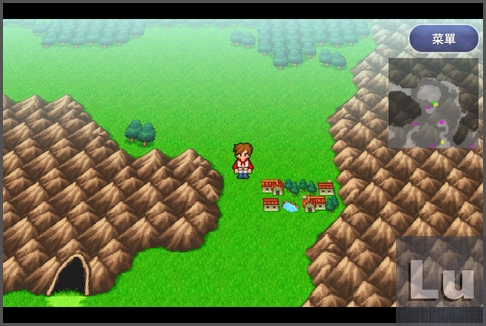
確認職業和 JP 都處理 OK 之後,我們就進去布拉斯卡村探個究竟。
Confirm the Jobs and JP are OK, then we get into Braska.
取得道具:
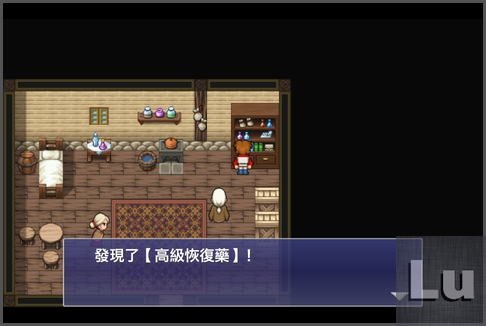
1. 入口左側房內櫃子:高級恢復藥
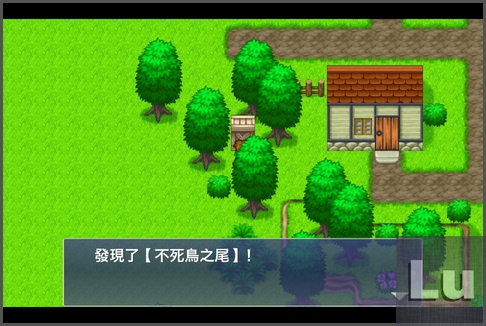
2. 入口左側房外左邊箱子:不死鳥之尾
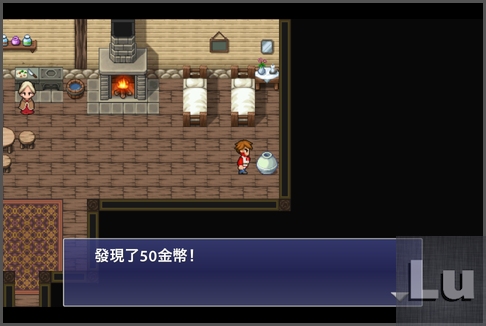
3. 左上方村長家白壺:50元 ( 也太少了吧 )
4. 道具店後方箱子:恢復藥
Get items:
1. The cabinet in the left house near the entrance: Hi-Potion
2. The box out of the house’s left-side near the entrance: Phoenix Down
3. The pot in the chief’s home (up-left side): 50 Gil (too little…)
4. The box behind Item Store: Potion
居然連櫃子上都有道具,史克威爾我真是猜不透你啊…..
Unexpectedly, the cabinet contains a item. I can’t believe you…..Square.
大箱子也有
The box also contains an item
村長家的 50 元….Orz
50 Gil in chief’s home….Orz
道具店後方的箱子
The box behind Item Store
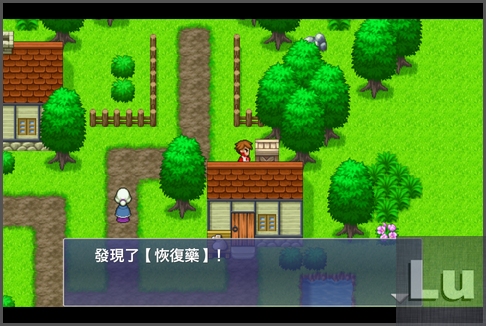
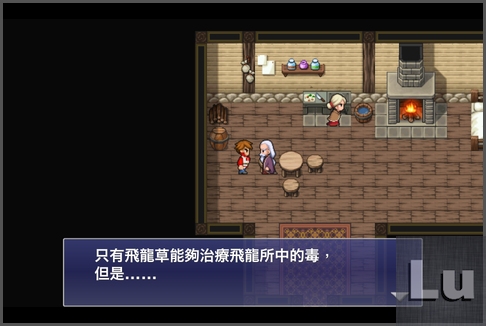
在村子裡面交談搜集情報,了解需要得到飛龍草才能治好飛龍,但我們必須先穿過旁邊的迪斯特洞窟
Then collect informations in Braska. We known that we have to get the Dragon grasses to cure dragons. And we have to go through “Cave to Deist”.
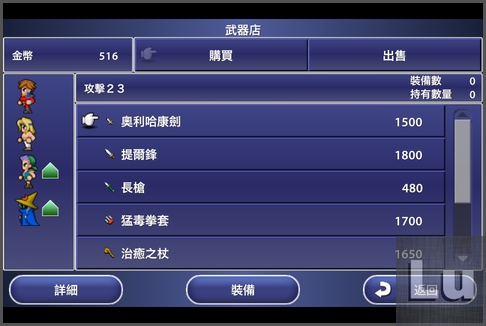
這裡的武器和防具幾乎都在之前的劇情中到手過了,所以沒什麼好買的,看看有什麼需要的物品,買一買就可以出發了,「迪斯特洞窟」就在旁邊而已。
The weapons and armors in Braska’s stores are not useful because we have already got those. Just buy anything you need then go to “Cave to Deist”.
迪斯特洞窟
Cave to Deist
這邊的敵人會感覺稍強一些,且遇敵率似乎也不低,所以需要先簡介一下這邊會遇到的敵人,比較有點心理準備,不會手忙腳亂。
The enemies are more strong than before. So, I introduce some enemies.
凱特西斯:HP 280 (Cait Sith: HP 280)
技能:「混亂」( 單體 ) Skill: “Confuse” (single target)
弱點:火屬性 Weakness: Fire
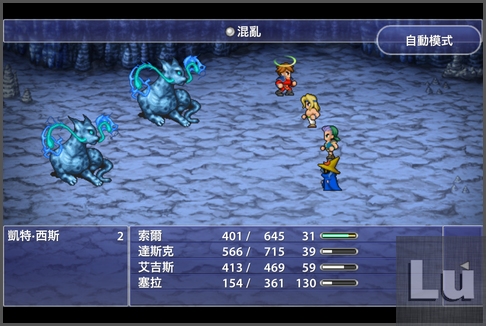
可裝備「纏頭帶」防混亂 ( 盜賊、赤魔、武僧可裝備 ),如果之前的寶箱都沒有漏掉的話,你現在應該會有兩個纏頭帶。可以針對火屬性弱點放火炎,或是融合技魔法爆彈 ( 治療 + 火炎 ),再搭配物理攻擊即可,但 MP 不多要省點用XD
–
You can equip “Headband” to prevent Confuse (Available for Thief, Red Mage, and Monk). If you get all treasure chests in the past, now you have two Headbands. Use Fira or Magic Bomb to deal fire damage to it, or deal physical damage to it. Be careful because your MP is not enough.
地底蜈蚣:HP 570 (Tunneler: HP 570)
技能:「地震」全體傷害約 75~85 (Skill: “Earthquake”, about 75~85 damage to all targets)
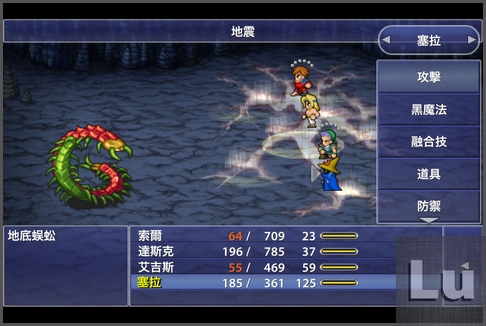
地震有點痛,要小心。打法可善用武僧的技能「發勁」( 讓敵人陷入異常狀態,睡眠.麻痹.減速.即死 ),比較安全。
–
“Earthquake” deals bigger damage, be careful. You can use Monk’s skill: Lotus Strike. (Randomly inflicts Sleep, Paralysis, Slow, or Instant Death on a single enemy.)
–
穴龜:HP 300 (Cave Turtle: HP 300)
技能:「甲殼」單體傷害約 70 Skill: “Carapace” about 70 damage (single target)
弱點:冰屬性 Weakness: Ice
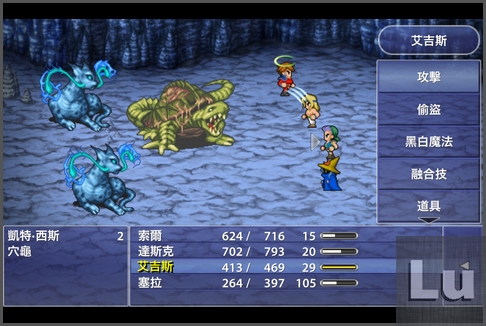
這傢伙雖然看起來很壯,但其實還算好應付,除了搭配冰屬性魔法去攻擊之外, MP 夠的話記得給他減速一下。
–
This enemy is look like strong, but it is easy. Attack it by Magic with ice damage and inflict it Slow if you have enough MP.
–
絞果花鼠:HP 200 (Rabid Nutkin: HP 200)
技能「粉碎打」單體傷害約 80,「門牙」更高達 120~130 左右
Skill: “Smash to Bits” deals about 80 damage (single target), “Incisors” deals almost 120~130 damage (single target)

這傢伙跟穴龜根本就成了反比,小小一隻力大無窮,沒什麼特別打法,小心為妙,如果站後排雖然可以傷害減半,但自己的攻擊力也會減半,除非搭配弓、鞭類武器,我是認為用劍砍就好了,他 HP 才 200….
–
This enemy is inversely proportional to Cave Turtle. A small body with strong power. Be careful.
–
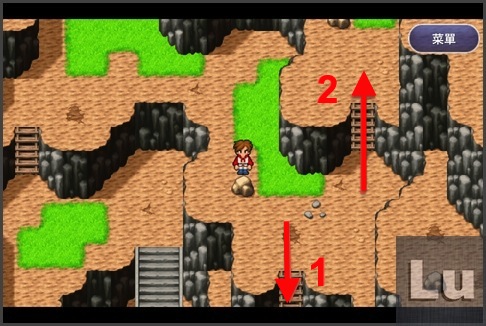
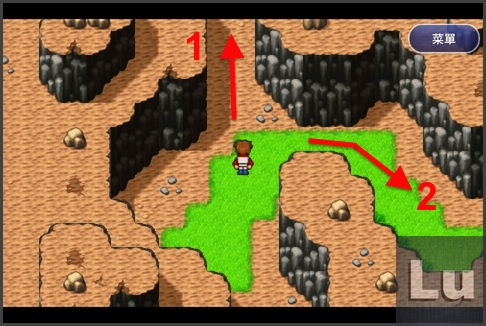
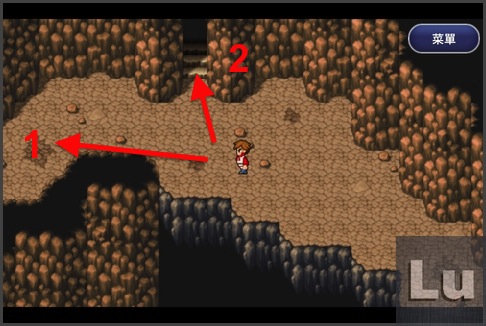
由於劇情越後面的迷宮叉路似乎越多,所以我在之後的迷宮會盡量加上數字與箭頭標示,遇到叉路時可以參考一下圖片走的順序和方向,比較不會浪費時間。迷宮中該區域會取得的寶箱都會在開頭先說明,之後照路線走都會取得的。
–
Because of sideroad will become more complicated in the future, I will add arrows and numbers in my screenshots. You can refer to screenshots for direction and save your time. I will explain all items are contained by treasure chests at beginning of the area in maze. You will get all items if you follow my directions.
–
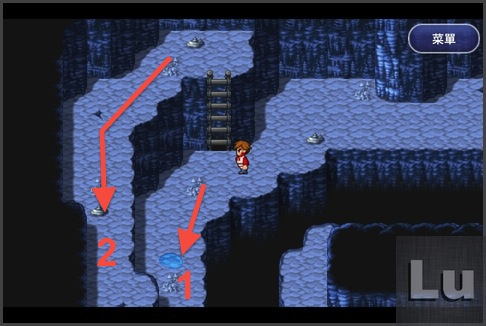
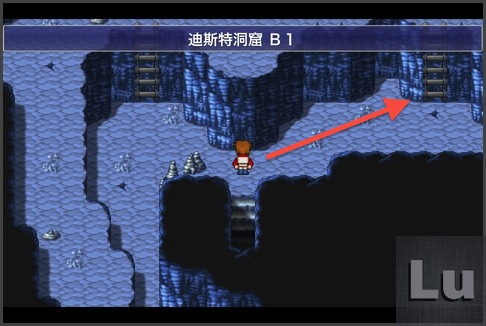
迪斯特洞窟 B1 – 1
Cave to Deist B1F-1
–
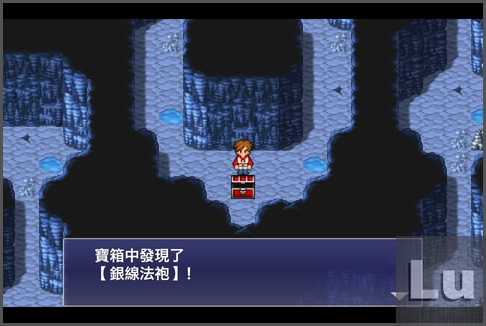
寶箱:高級恢復藥、銀線法袍
Chest: Hi-Potion, Silver-spun Robe
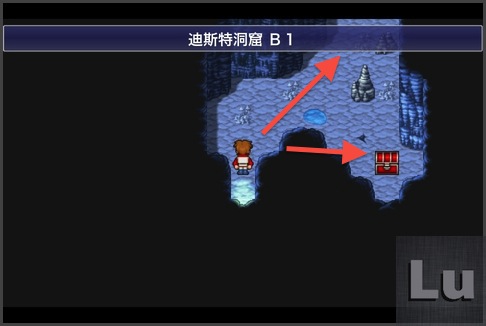
下面有個寶箱
Here is a chest
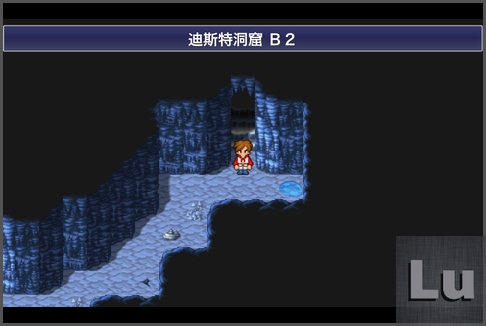
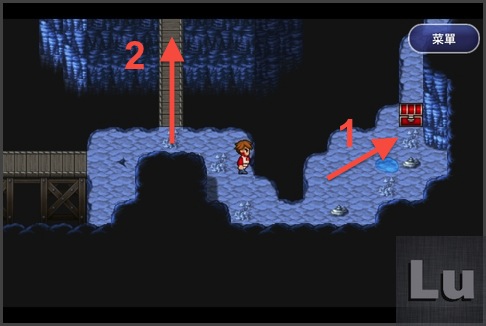
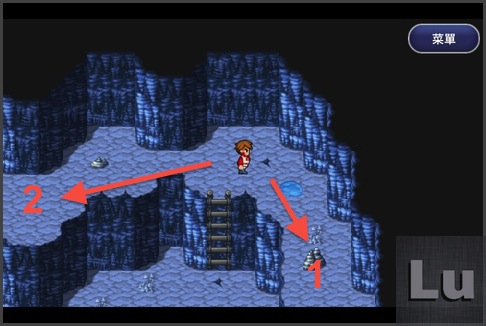
迪斯特洞窟 B2 – 1
Cave to Deist B2F-1
–
寶箱:頭巾
Chest: Bandana
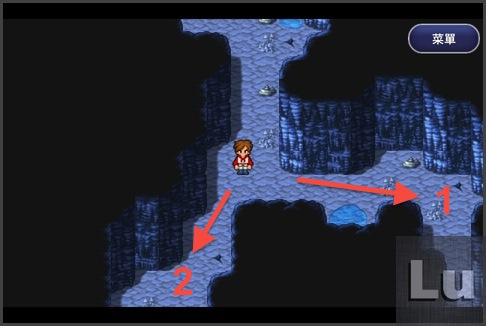
叉路:右 ( 寶箱 ) > 左 ( 主線 )
Sideroad: Right (Chest) > Left (Main route)
–
–
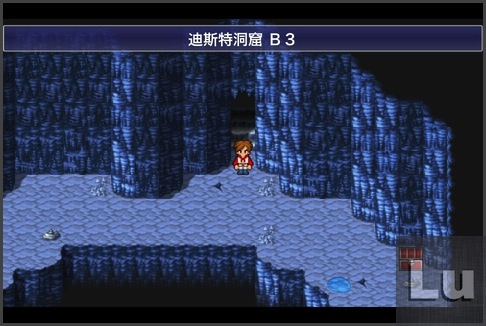
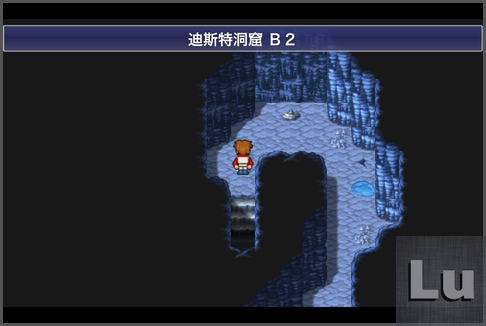
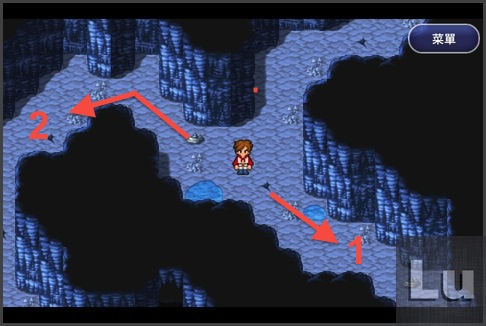
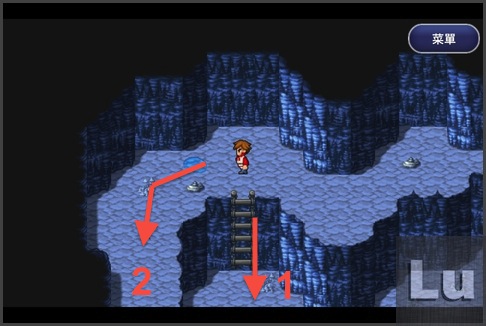
迪斯特洞窟 B3 ( 儲存點 )
Cave to Deist B3F (Save point)
–
寶箱:不死鳥之尾、治癒之杖、帳篷
Chest: Phoenix Down, Healing Staff, Tent
拿完寶箱可以恢復 / 儲存一下再繼續走
Get the chest and save / restore then keep going.
–
叉路:下 ( 儲存點 ) > 左 ( 主線 )
Sideroad: Down (Save point) > Left (Main route)
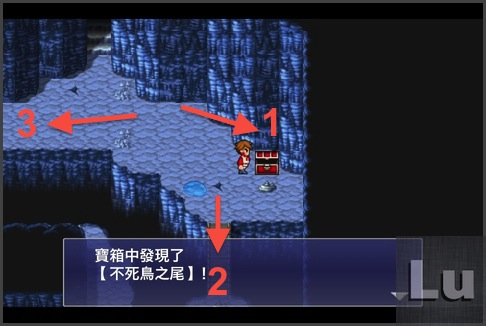
叉路:下 ( 寶箱 ) > 上 ( 主線 )
Sideroad: Down (Chest) > Up (Main route)
–
–
叉路:右 ( 寶箱 ) > 上 ( 主線 )
Sideroad: Right (Chest) > Up (Main route)
–
–
迪斯特洞窟 B2 – 2
Cave to Deist B2F-2
–
寶箱:鋼盾
Chest: Steel Shield
叉路:右下 ( 寶箱 ) > 左 ( 主線 )
Sideroad: Down-right (Chest) > Left (Main route)
–
–
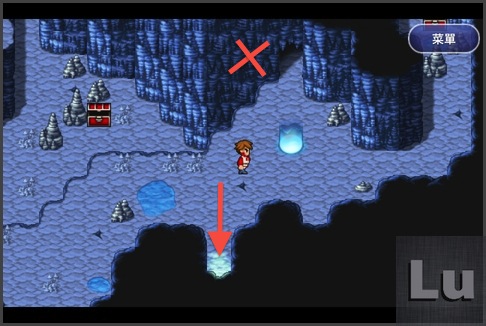
迪斯特洞窟 B1 – 2 ( 儲存點 )
Cave to Deist B1F-2 (Save point)
–
寶箱:1000 元、猛毒拳套、乙太
左邊擋住了,直接走右邊
Chest: 1000 Gil, Poison Kunckles, Ether
Left is locked, go right
叉路:右下 ( 寶箱 ) > 左 ( 主線 )
Sideroad: Down-right (Chest) > Left (Main route)
叉路:下 ( 寶箱 ) > 左下 ( 主線 )
Sideroad: Down (Chest) > Down-left (Main route)
–
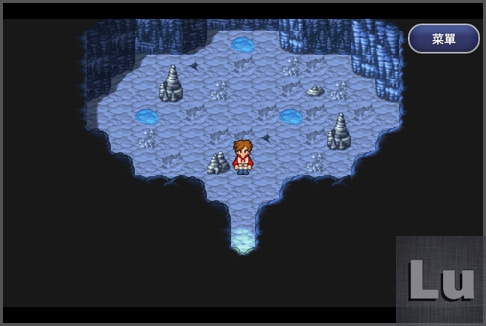
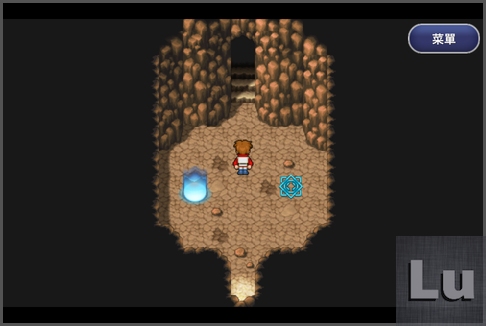
上面是空洞穴,下面就是出口了,這裡還有個儲存點
Up-side is an empty cave and down-side is exit. Here is a save point.
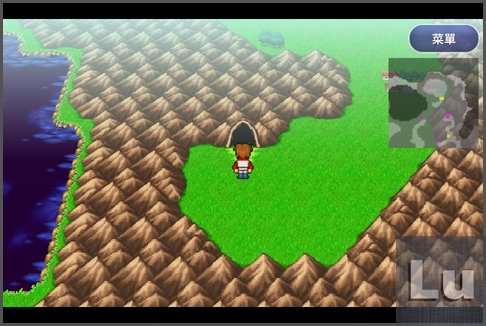
這個神秘的空洞穴是不是有點奇怪呢?
Is this mysterious empty cave a little strange?
–
–
原來這是「奇美拉」首次出現的地點,出現機率低,身上帶著稀有的「紅色尾巴」,不夠要打贏牠可能有點難….( 以現在的等級,應該是非常難,果然XDDDDDDDD )
–
This is the first location you will meet Chimera at. It appears and drops items (Red Tail) with low probability. It’s difficult to win now. (Certainly, It’s very difficult to win because of the roles’ current level……)
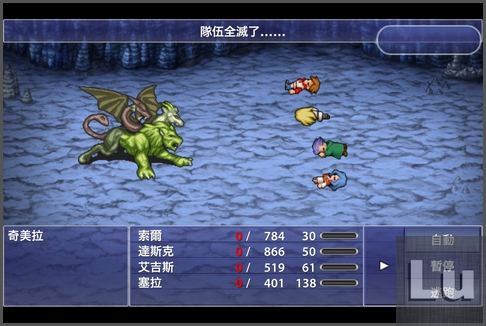
其實也不是不能打,目前除了等級練高一點之外別無他法,這傢伙還冰火雷三屬性傷害減半,如果真的很想要現在就拿到紅色尾巴,可能會一直面臨這樣的情況XDDDD ( 原來這就是外面有個儲存點的原因…. ),想現在打的話自己另外準備吧!在最終章都還會遇到的。
–
In fact, maybe you can upgrade to a higher level to win. Chimera halves the ice, fire, and lightning damage. If you really want to receive the Red Tail, you should prepare by yourself. But you can meet it again before clearance. (God bless you……….Now we know why the Save point is here…..)
–
–
一走出洞窟就有飛龍來襲,戰鬥在芭芭拉來了之後會強制結束,繼續要前往「迪斯特鎮」
Here comes a dragon when we are leaving. Battle will auto quit after Barbara’s coming. Then we go to Deist.

迪斯特鎮
Deist
–
離開洞窟後繼續往下走,就會來到迪斯特鎮
Keep going south to Deist.
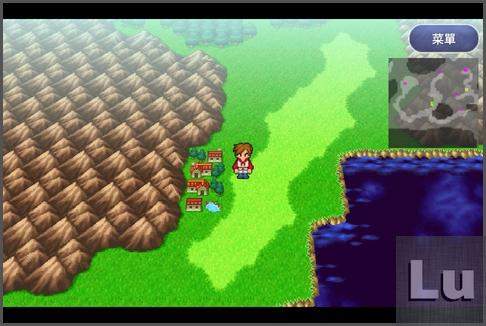
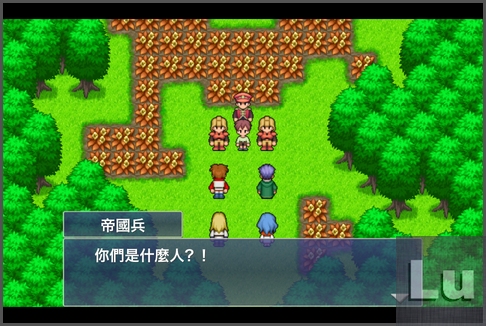
一行人來到迪斯特鎮,發現這裡也到處是帝國兵,當然就要進去打探一下情報
( 其實是為了搜括更多免費的道具XDDDD )
We found a lot of empire soldiers here. So we get in to find some informations.
(Honestly, we want to collect more items for free….)

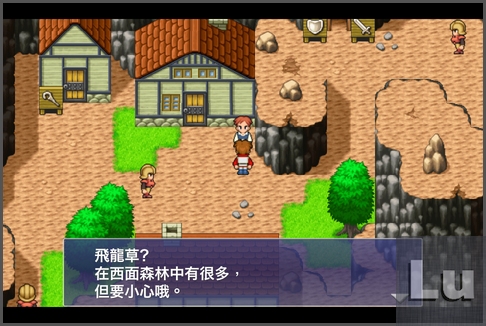
也會問到飛龍草取得地點的情報
An information about the dragon grass.
這裡的魔法店已經可以買到 LV3 的黑白魔法,記得買一買;武器 / 防具店的部份,可以看看新的武器,攻擊力都有再提升,其中「提爾鋒」如果你有盜賊的話,這邊就不用買,等一下後面去偷別人的就好了,而且有兩把可以偷…..XDDD
Remember to buy Black and White Magic Lv. 3 here. And take a look for weapons and armors. You don’t need to buy Tyrfing here if you have a Thief in your party. Because you can steal two Tyrfings from someone later.
在觸發事件之前,讓我們先把這裡藏得亂七八糟 ( 真的很亂 ) 的道具都拿完再說:
Before checking an event, let us to find all items here:
取得道具:
( 有幾個藏得較隱密,可以參考下面的截圖 )
1. 先到魔法店右邊房子內的白壺:金針
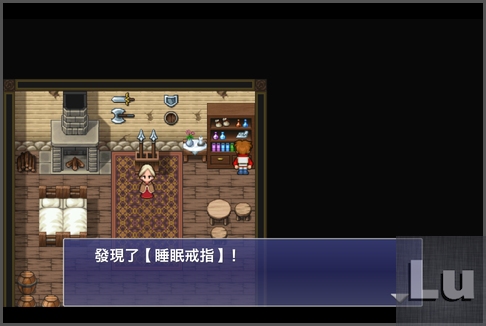
2. 左邊伊娃的家中櫃子右側:睡眠戒指
3. 旅館右下方房子中的櫃子左側:恢復藥
4. 旅館右下方往南暗道的白壺:300 元
5. 右下方理查的家右下往南暗道白壺:銀手鐲
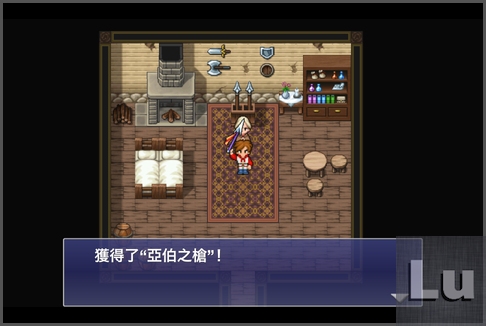
6. 右下方理查的家中的槍架:長槍
7. 右下方理查的家中的白壺:解毒藥
8. 村內洞窟後面出口的白壺:高級恢復藥
Get items:
(Some are secret. You can refer to the following screenshots)
1. The pot in the house at right-side of magic store: Golden Needle
2. The cabinet in left Ebba’s house: Drowsy Ring
3. The cabient in the house at Inn’s down-right side: Potion
4. The pot in a secret passage at Inn’s down-right side: 300 Gil
5. The pot in a secret passage at south-side of Ricard’s house: Silver Bangle
6. The spear rack in Ricard’s house: Spear
7. The pot in Ricard’s house: Antidote
8. The pot in the cave exit in Deist: Hi-Potion
伊娃的家中櫃子
The cabinet in left Ebba’s house
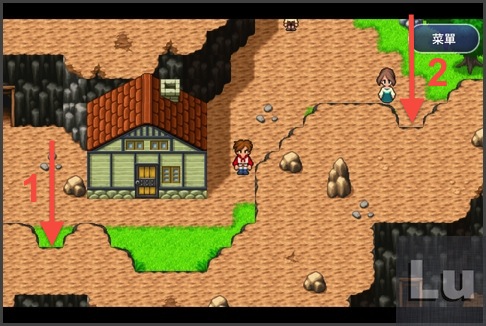
站在村子右下角這個位置,可以看到兩邊各有一個暗道入口,都有道具可拿
Stand here. You can see two secret entrance at both sides.
–
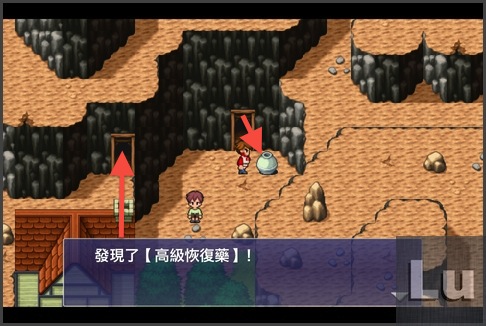
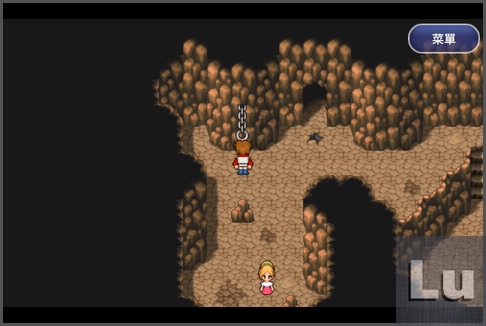
村子內部有一個神秘洞窟 ( 又是神祕洞窟…. = = ),出口也有道具
There is a mystery cave in Deist, and you can get an item near exit.
洞窟裡面有個拉環,拉一下出現一個「洞中洞」?!
You can turn on the switch in the cave, and a second cave appears.
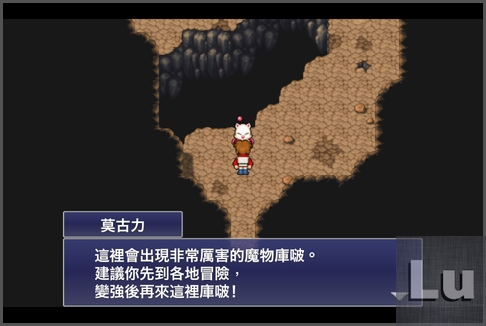
而這個神祕洞窟據莫古力的說法是有很恐怖的敵人,等以後練強一點再來比較好
Moogle told us some scary monsters inside here. We should adventure a bit more and come back later.
眾年輕人血氣方剛啥都沒在怕,二話不說直接走進去,然後才走沒幾步 ……
嗯,以後要乖乖聽莫古力的勸告….XDDDDD
We are not afraid and keep going directly, but after some steps….
Well, we should follow Moogle’s advice.
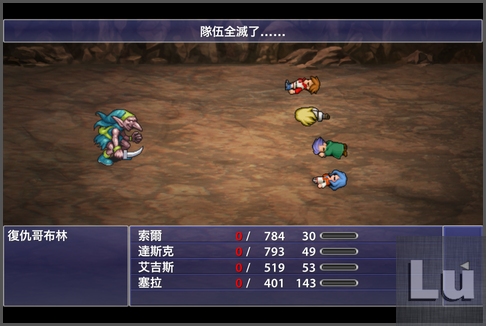
遇敵:復仇哥布林,HP 1500
Enemy: Avenger, HP 1500
結論:還是過一陣子再來打好了…..
Conclusion: Come back later….
這傢伙儼然是洞中洞的守護者,每次出手就是 450 ~ 550 的傷害,以主角們現在的等級要挑戰恐怕是「非常困難」。名為「復仇哥布林」,只要受到物理攻擊,會立刻回擊 ( 沒有 ATB 嗎?誇張 ),若是用魔法攻擊,也會馬上回擊「生物」魔法 ( 持續失血狀態 ),根本挨不了幾刀就全滅了。
This guy is really a protector of the cave. He attacks almost 450~550 damage every time. It’s very difficult to fight against him by role’s current level. Avenger always returns attack when being physically attacked. (No ATB bar?) If you use magic to attack, he will return Rio magic attack. (Keep Losing HP) Game Over is easy.
洞中其實路線很短,前段與後段分別各有一個寶箱,如果用「遁逃」的方式漸漸接近,寶箱打開也是要先打一場再說,還是會全滅。而且這個洞裡面的遇敵機率是「超級高」,都是走沒兩三步就追上來了,連移動都困難重重,所以還是先打消念頭吧!先去救飛龍,以後再來修理他,反正這個洞穴一直到通關都會存在的,不用擔心不能報仇XDDDDDD
The path in the cave is very brief. The front and back section both have one treasure chest. If you approach the chests by “Flee”, you still battle when you open it. The probability of random battle here is very high, and you’ll be difficult to move. My suggestion is that go to save dragons at first. Come back to fight him later because this cave will be still here.
–
攻略方式請參考:吟遊詩人篇 – 復仇哥布林
Refer to: The Bard – Avenger
–
–
道具都拿完之後,就要觸發一下事件,有兩間房間要去,一個是左邊「伊娃的家」,一個是右下角「理查的家」。
After getting items, we have to check two events: Left Ebba’s house and down-right Ricard’ house.
先去找伊娃,講到關於芭芭拉的事情,伊娃要主角們幫忙帶「亞伯之槍」給芭芭拉
Ebba talks about Barbara and let us bring “Abel’s Spear” to Barbara.
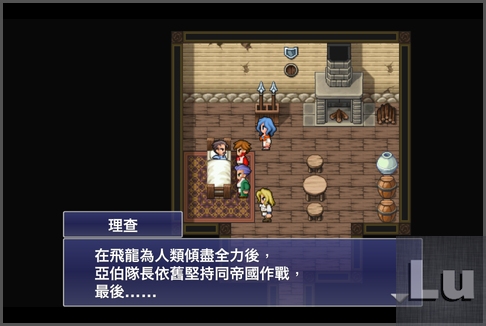
接著再去找臥病在床的理查關心一下
Then take care about sick Ricard
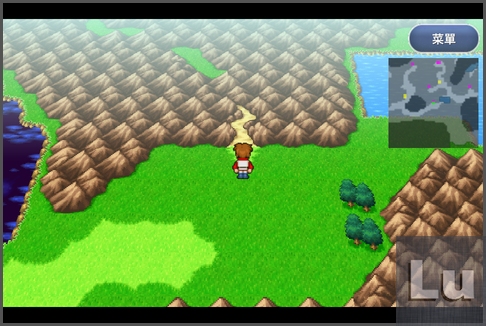
整理休息一下之後,就離開迪斯特鎮,往左側一路繞到位於北邊「飛龍草叢生地」
Take a rest and leaving. Go left and all the way north to “Dragonweed Gardens”.
飛龍草叢生地
Dragonweed Gardens
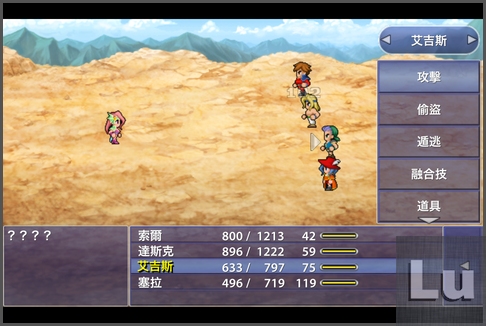
一進去就準備迎來了小 BOSS 戰
Confront a little Boss Battle.
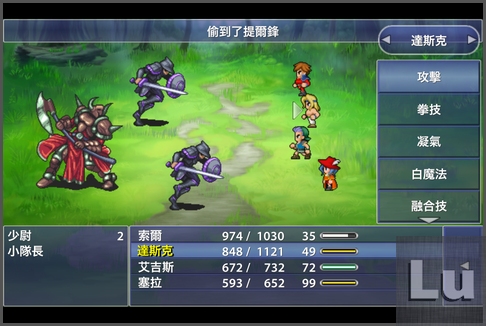
BOSS 戰:小隊長x1、少尉x2 (Boss Battle: Lieutenant x1, Ensign x2)
HP:小隊長約 3000、少尉約 750 (HP: Lientenant 3000, Ensign 750)
偷盜:小隊長 – 鋼鎧、少尉 – 提爾鋒 (Steal: Lientenant – Steel Armor, Ensign – Tyrfing)
備註:減速可用 (Note: Slow works)
攻略:
開戰之後如果你有盜賊,當然就是偷光他!兩個少尉身上都有提爾鋒,很好偷,是目前能到手攻擊力最高的武器,如果已經有了拿去賣錢也不錯XD,一把可以賣 900,而小隊長身上的鋼鎧應該屬於低機率,要偷好幾次才能得手,多利用減速魔法增加一點時間。
–
Suggestion:
If you have a Thief, steal their all items! Two Ensigns both have Tyrfing. It is the weapon with the highest ATK now. Maybe you want sell it because of the price is 900 Gil. And the Steel Armor can be stolen from Lientenant with a low probability. You can use Slow magic.
–
偷光之後,當然就開始處理他們了,就用你各式強力的攻擊去打就好,注意回復。過程中都是物理攻擊,有時候會帶混亂效果要注意,前面兩個少尉好解決,小隊長的攻擊並不猛烈,稍微磨一下就能搞定了。
–
After stealing all items, then kill them all by any strong skill you have, and remember to restore. Boss’ attack sometimes inflicts Confuse. It’s just a easy Boss Battle.
–
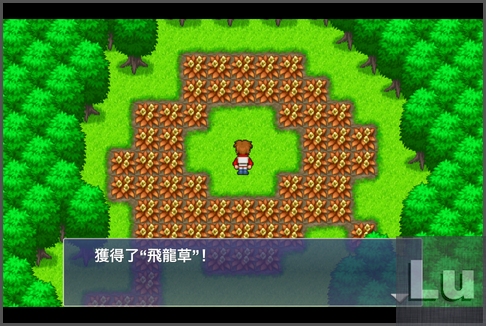
戰鬥結束後即可取得「飛龍草」( 經過草地會損血請注意 )
Get “Dragon grass” after the battle. (Pay attention to that grasses will hurt you)
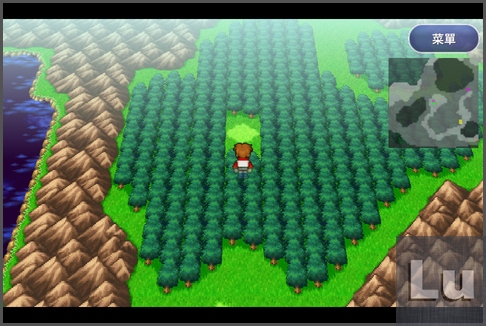
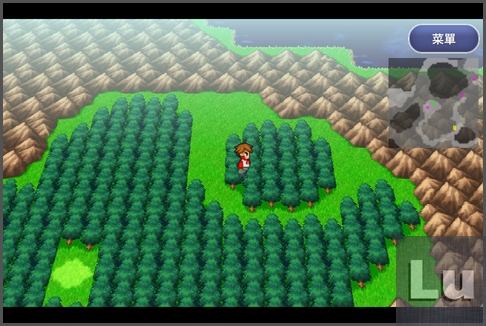
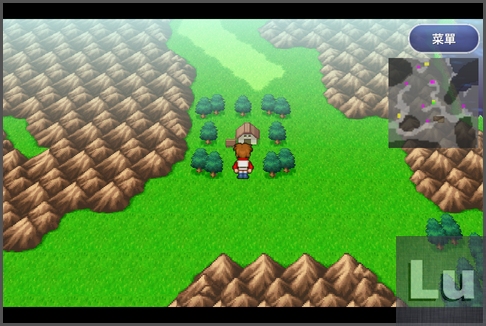
拿到飛龍草之後,就要來去救飛龍了,目的地有點遠,要走回迪斯特鎮右下角的「飛龍之谷」。離開前右上角有陸行鳥之森,懶得打路上雜兵的話就找隻陸行鳥代步一下。( 如果道具不太夠的話中途可以回迪斯特鎮補充一下再出發 )
–
Then we have to go to “Dragon Valley” (at the down-right of Deist) to save dragons. You can ride a Chocobo in the up-right side of here. And you can go back to Deist buying some items.
飛龍之谷
Dragon Valley
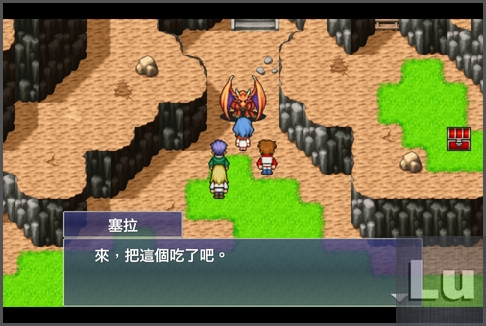
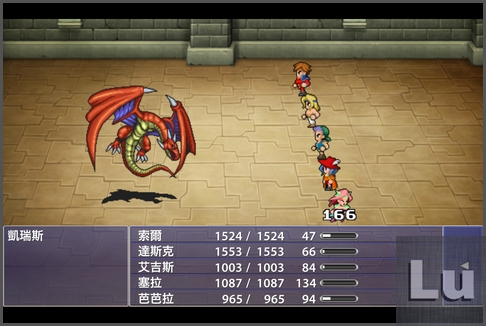
一進去就看到飛龍,好心送藥來竟然不領情,我看是欠宰 …..
A dragon is stand by entrance. But the dragon doesn’t want to eat dragon grass.
–
–
算了,既然都飛走了,我們也只好繼續往前。
Never mind. We keep moving.
–
飛龍之谷這邊的地形有點混亂,也沒有註明是什麼位置是屬於那一區,所以在區域的劃分上就以地圖1、地圖2、地圖3 …… 這樣來區分,差異就是在於畫面有沒切換為主,請自行留意。
–
The terrain of Dragon Valley is a little complicated. So I named that Map:1, Map:2…, etc. The difference is when screen switching.
–
這裡的雜兵「食人魔」有極低機率會掉落裝備「巨人護手」,如果你夠有耐心的話,不妨多試幾次手氣。如果一直沒掉的話,後面會去的 雷鳴洞窟 也會出現。
–
The enemy named “Ogre” drops “Giant’s Armlet” with a low probability. If you have enough patience, try several times. And if you never get it, Ogres will also appear in Cave of Fulmination.
–
巨人護手:防禦 9 迴避 5 力量 5 速度 -5 體力 5 智力 -10 精神 -10
Giant’s Armlet: DEF 9 EVA 5 STR 5 SPD -5 VIT 5 INT -10 MND -10
–
關於巨人裝備的收集請看:[專題] FFD 巨人裝備的收集
About collecting Giant’s equipments: [subject] FFD: Collecting Giant’s Equipments
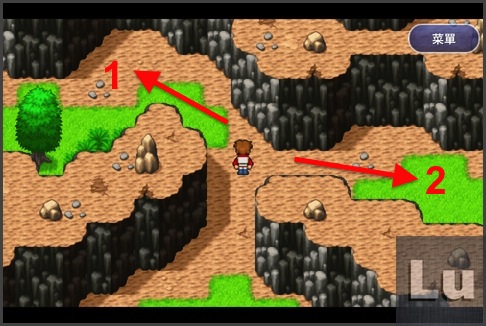
飛龍之谷 地圖1
Dragon Valley: Map 1
–
寶箱:解毒藥
叉路:下 ( 寶箱 ) > 上 ( 主線 )
Chest: Antidote
Sideroad: Down (Chest) > Up (Main route)
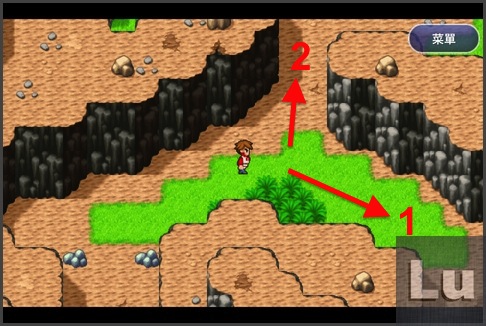
飛龍之谷 地圖2
Dragon Valley: Map 2
–
寶箱:不死鳥之尾、乙太
叉路1:右下 ( 寶箱 ) > 上 ( 主線 )
Chest: Phoenix Down, Ether
Sideroad 1: Down-right (Chest) > Up (Main route)
–
–
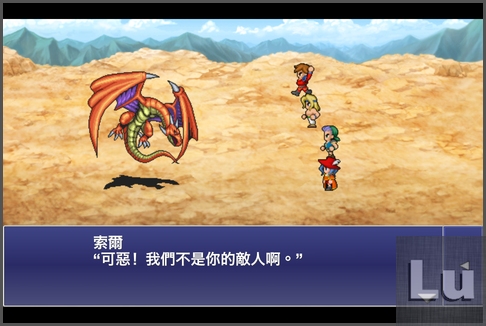
中途會遇到剛剛不領情的飛龍,沒想到這會兒竟然是來打我們的,沒心沒肺的傢伙….
( 打沒幾回合芭芭拉就會出現,戰鬥強制結束 )
We will battle a dragon on halfway….
( Barbara will come here and quit the battle)
叉路2:左 ( 寶箱 ) > 右 ( 主線 )
Sideroad 2: Left (Chest) > Right (Main route)
–
–
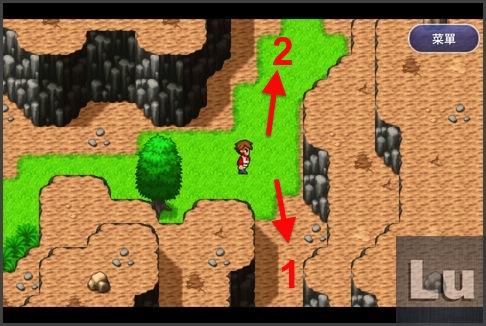
飛龍之谷 地圖3
Dragon Valley: Map 3
–
寶箱:高級恢復藥、鋼護手
叉路1:左下 ( 寶箱 ) > 右 ( 主線 )
Chest: Hi-Potion, Bronze Armlet
Sideroad 1: Down-left (Chest) > Right (Main route)

叉路2:下 ( 寶箱 ) > 上 (主線 )
Sideroad 2: Down (Chest) > Up (Main route)
–
–
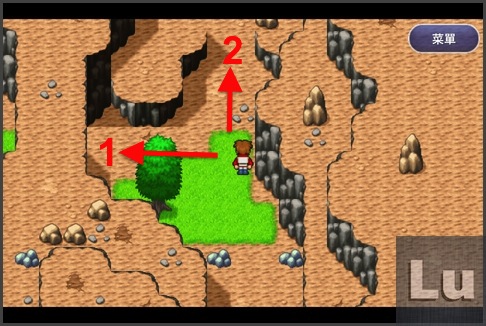
飛龍之谷 地圖4
Dragon Valley: Map 4
–
寶箱:斬擊斧、鏈甲
叉路:左 ( 寶箱 ) > 上 ( 主線 )
Chest: Slasher, Chainmail
Sideroad: Left (Chest) > Up (Main route)
–
–
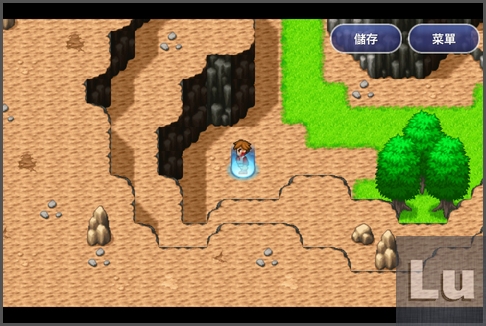
飛龍之谷 地圖5 ( 儲存點 )
Dragon Valley: Map 5 (Save point)
–
寶箱:山彥草
叉路:左下 ( 寶箱 ) > 下 ( 主線 )
Chest: Echo Grass
Sideroad: Down-left (Chest) > Down (Main route)

這裡中途會經過儲存點
Go through the a Save point.
–
–
飛龍之谷 地圖6
Dragon Valley: Map 6
–
這裡只有一小段路,遇到芭芭拉來 嗆聲 打招呼….
叫我們回去?門兒都沒有!
Here is a small section, and we meet Barbara.
She let us go back but we can’t!
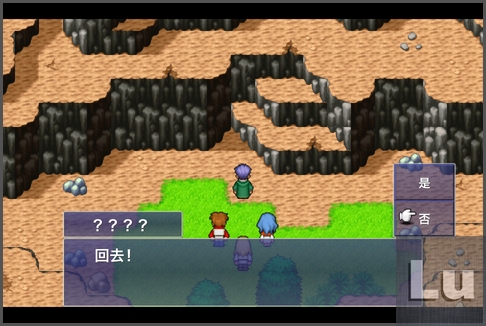
快跟我們走吧,別鬧了,這樣也要打 ( 強制結束 )
Can you join us? Come on…..(Force Quit)
–
–
飛龍之谷 地圖7
Dragon Valley: Map 7
–
寶箱:500 元、乙太
叉路:上 ( 寶箱 ) > 右 ( 出口 )
Chest: 500 Gil, Ether
Sideroad: Up (Chest) > Right (Exit)
–
–
飛龍棲息地
Dragon Roost
–
–
取得道具:
1. 旅館木桶:恢復藥
2. 芭芭拉的家中白壺:解毒藥
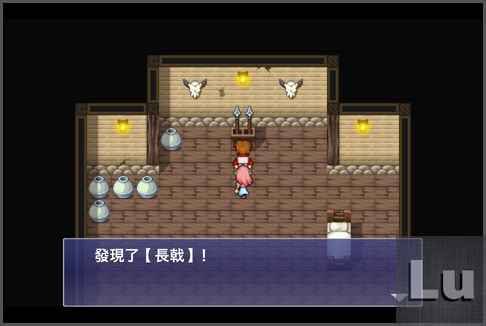
3. 芭芭拉的家中槍架:長戟
–
Get items:
1. The cask in Inn: Potion
2. The pot in Barbara’s house: Antidote
3. The spear rack in Barbara’s house: Halberd
–
槍架上面有支長戟也是很合理的
It’s reasonable that a Halberd on the spear rack.
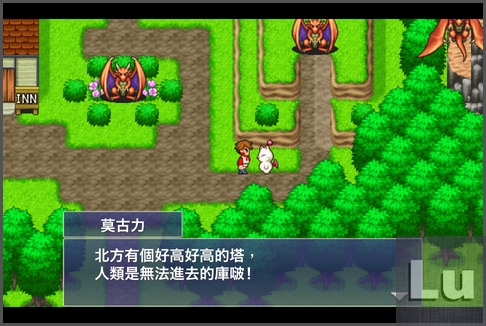
入口的莫古力繼續提供情報,說北方有個好高好高的塔,人類是無法進去的,這意思就是 …… 等一下我們要去的意思,至少這次沒說不要去XDDDDD
Moogle provides an information about a very high tower at map’s north. Human beings can’t go there. That means….we’ll go there.
旅館的莫古力也繼續說著,東面的洞窟中,有雷鳴響好可怕,也是沒說不要去,所以….XD
The Moogle in Inn provides the other information that a cave at east is thundering

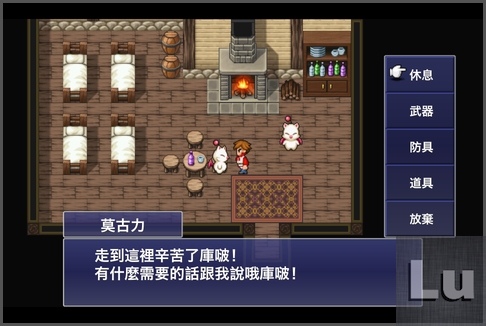
旅館中另一隻莫古力可以向他購買武器 / 防具 / 道具等物品,很方便XD
You can buy items or weapons from the other Moogle in Inn.
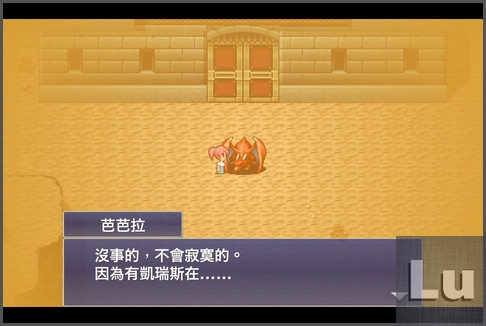
道具都拿完後,去找芭芭拉談話,這小妮子還是不領情,說要去高風之塔找凱瑞斯 ( 飛龍 ),因為凱瑞斯要下蛋了 ( 為什麼下個蛋要特地跑去塔上?在這裡下一下不就好了XDDDDD )
After getting all items, go to talk with Barbara. But she said she will go to find Ceres because Ceres will lays egg, and dragon lays egg in Highwind Tower. (Why?….)
目前可以稍微喘口氣,根據現有的情報,我們現在應該要前往「高風之塔」,但是又說到東邊的洞窟有雷鳴聲,是不是該去看一下呢?離開飛龍棲息地之後,基本可以選擇要不要先去雷鳴洞窟,或是直接去高風之塔都可以,目前主角的等級去打雷鳴洞窟是還蠻 OK 的,不會太難。
–
Now we can take a rest. According to informations we have, we should go to “Highwind Tower”. But Moogle said there is a thunder cave to east. So we can go to one of these. It’s not really hard to go to Cave of Fulmination by the current level.
–
雷鳴洞窟還有召喚魔法「拉姆」可以拿,一直到劇情最後段都還能再回來拿,想先拿的現在就可以去了。召喚魔法「拉姆」可以和黑魔法 LV6 的「暴雷」組成融合技「大三角」( 敵方全體雷屬性傷害,並使其陷入麻痹狀態 ),但目前的進度到可以買到 LV6 的魔法還有一段距離,是學不太到的。
–
You can acquire a Summoning Spell: “Ramuh” in Cave of Fulmination even if game cleared. Ramuh and Thundaga (Black Magic Lv. 6) can fuse a Fusion Ability (F-Ability) is named “Grand Delta”. (Deals lightning damage to all enemies and inflicts Paralysis, halting actions.) But it’s so far away to buy Black Magic Lv. 6.
–
如果你決定先前往高風之塔,要先準備一下,找旅館中的莫古買一些解毒藥、山彥草(解沉默)、金針(解石化),十字架(解詛咒,但戰鬥結束就自動解除了,量不用多),因為高風之塔的雜兵會使一堆狀態技能,也會中混亂,所以目前唯一可以防混亂的纏頭帶也別忘了裝備上。
–
You have to prepare if you decide to go to Highwind Tower. Buy some Antidotes, Echo Grasses (Cure Silence status), Golden Needles (Cure Stone status), and Sacred Candles (Cure Curse status, but Curse status auto removes when battle is over) because enemies in Highwind Tower use a lot of status skills include Confuse. Don’t forget to equip headband which is the only one armor of preventing Confuse now.
–
下面的攻略繼續的是「雷鳴洞窟」,要打的話建議先到「高風之塔」觸發事件,讓芭芭拉加入隊伍,這樣就有 5 個人可以一起去,且芭芭拉目前的技能也會很好用。沒有要打的就自行先跳過吧!
–
The following location is Cave of Fulmination. If you wanna go there first, I suggest you go to check an event at the entrance of “Highwind Tower“, and let Barbara join the party. Then 5 roles go together.
–
–
–
雷鳴洞窟
Cave of Fulmination
–
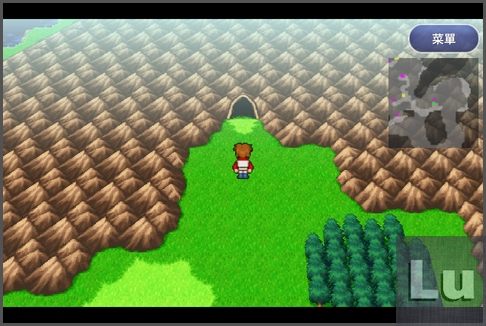
從飛龍棲息地右下角一直走,就可以到達雷鳴洞窟。這裡的雜兵與最後的 BOSS 多以雷屬性為主,請避免裝備雷屬性武器 ( 例如:閃雷棒 ),或是使用雷屬性魔法,以免造成反效果,進去之前再確認一下。
–
Cave of Fulmination is at the down-right side of Dragon Roost. Enemies here and the Boss mostly absorb lightning damage. Don’t equip any weapon with lightning, and don’t use magic with lightning. You should confirm before entering.
–
–
遇敵資訊:
Some enemies information:
–
閃電哈皮:HP 750,物理攻擊約 150 ~ 180
技能:「閃電吐息」全體傷害約 200
弱點:風屬性
Thunder Harpy: HP 750, about 150~180 damage by physical attack
Skill: Lightning Breath, about 200 damage to all allies
Weakness: Wind
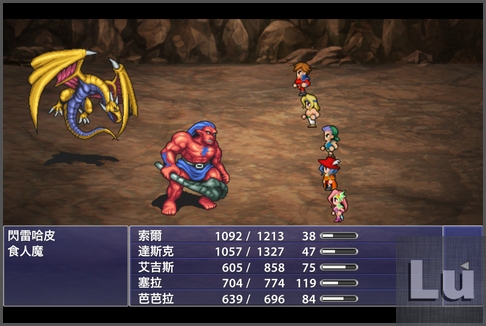
這裡的雜兵有個「閃電哈皮」較強要注意 ( 名字好怪XD ),可以多利用芭芭拉的跳躍,傷害約有 400 以上,如果你有武僧的波動擊,傷害也會有到 300 左右,效果都不錯。
–
You have to beware “Thunder Harpy”. Barbara’s skill (Jump) is very useful. (up to 400 damage) If your Monk has Aurablast, the damage is up to 300.
–
另外就是這裡也會出現雜兵「食人魔」,有極低機率會掉落裝備「巨人護手」,如果剛剛在飛龍之谷沒有拿到,不妨在這裡再多試幾次。如果還是一直沒掉,後續的章節也還有很多機會。
–
The enemy named “Ogre” drops “Giant’s Armlet” with a low probability. If you have enough patience, try several times again. And if you still never get it, Ogres will also appear in the other chapters.
–
巨人護手:防禦 9 迴避 5 力量 5 速度 -5 體力 5 智力 -10 精神 -10
Giant’s Armlet: DEF 9 EVA 5 STR 5 SPD -5 VIT 5 INT -10 MND -10
–
關於巨人裝備的收集請看:[專題] FFD 巨人裝備的收集
About collecting Giant’s equipments: [subject] FFD: Collecting Giant’s Equipments
–
–
–
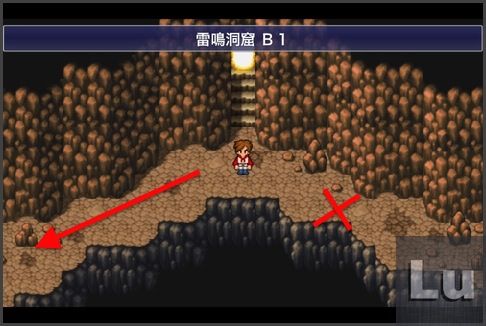
雷鳴洞窟 B1
Cave of Fulmination B1F
–
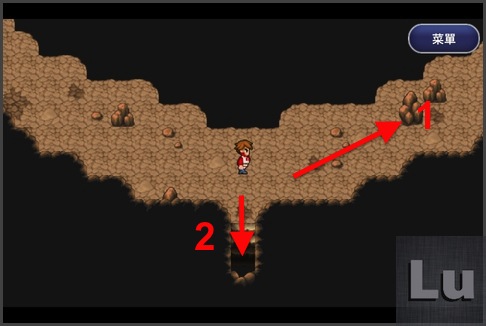
寶箱:不死鳥之尾
叉路1:直接往左邊走,右邊是死路
Chest: Phoenix Down
Sideroad 1: Go left directly (no road at right)
叉路2:右 ( 寶箱 ) > 下 ( 主線 )
Sideroad 2: Right (Chest) > Down (Main route)
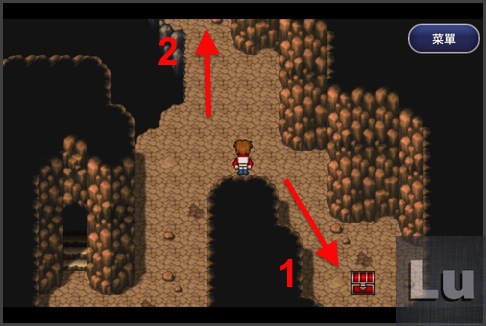
雷鳴洞窟 B2 – 1
Cave of Fulmination B2F-1
–
寶箱:魔術師帽子
叉路:右下 ( 寶箱 ) > 上 ( 主線 )
Chest: Magician’s Hat
Sideroad: Down-right (Chest) > Up (Main route)
雷鳴洞窟 B3 – 1
Cave of Fulmination B3F-1
–
寶箱:閃雷棒
叉路:左 ( 寶箱 ) > 上 ( 主線 )
Chest: Thunder Rod
Sideroad: Left (Chest) > Up (Main route)
雷鳴洞窟 B2 – 2
Cave of Fulmination B2F-2
–
寶箱:乙太
叉路:右下 ( 寶箱 ) > 左下 ( 主線 )
Chest: Ether
Sideroad: Down-right (Chest) > Down-left (Main route)
雷鳴洞窟 B3 – 2
Cave of Fulmination B3F-2
–
寶箱:萬能藥、特級恢復藥
叉路:右 ( 寶箱 ) > 下 ( 主線 )
Chest: Remedy, X-Potion
Sideroad: Right (Chest) > Down (Main route)
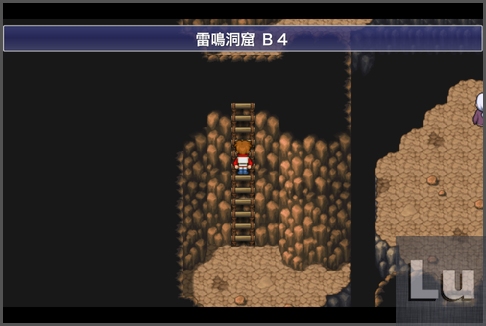
雷鳴洞窟 B4 – 1
Cave of Fulmination B4F-1
–
這裡沒有叉路,一路往下走
No sideroad here, go down directly.
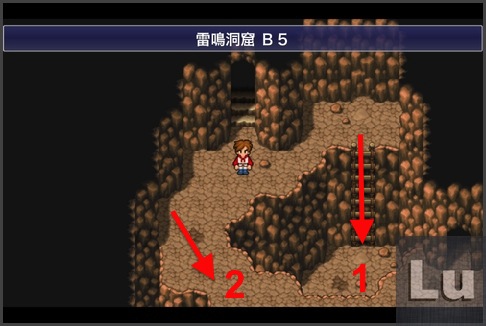
雷鳴洞窟 B5 ( 儲存點、傳送點 )
Cave of Fulmination B5F (Save point, Teleport)
–
寶箱:食人劍
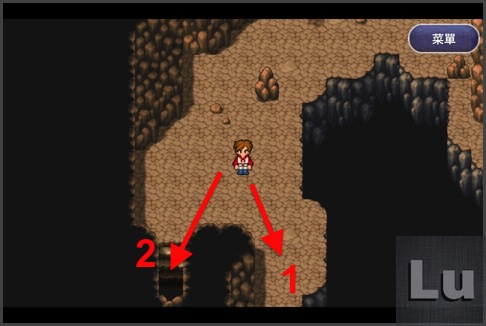
叉路:這裡有點小複雜,先走右邊樓梯 ( 第一條路 ) 下去,途中經過一個寶箱 ( 食人劍 ),再一路走到底會是 B4,有另一個寶箱 ( 貓爪 ),最後再回來走圖中的第二條路 ( 主線 ) 才會經過儲存點和傳送點。
Chest: Man-Eater
Sideroad: A little complicated here. Go to the right stair first. Get a chest (Man-Eater) and keep going to B4F. There is another chest (Cat Claws). Then go back to the left-side road, and you’ll pass through the Save point and Teleport.
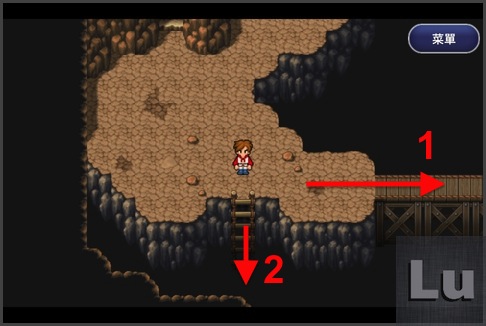
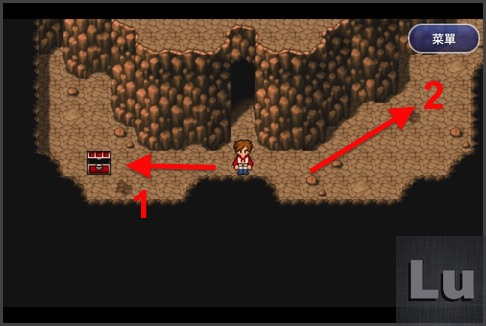
下來之後就是這裡,拿完食人劍之後就往右走到底去拿貓爪,之後再走原路回來
See below. Get Man-Eater and go right to get Cat Claws. Then go back the same road.
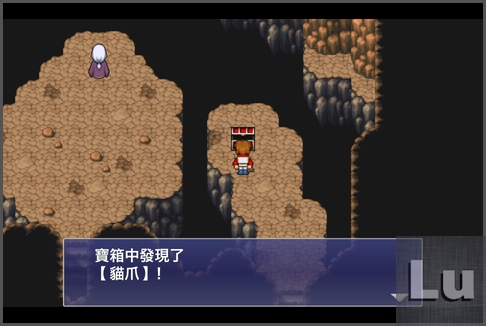
雷鳴洞窟 B4 – 2
Cave of Fulmination B4F-2
–
寶箱:貓爪
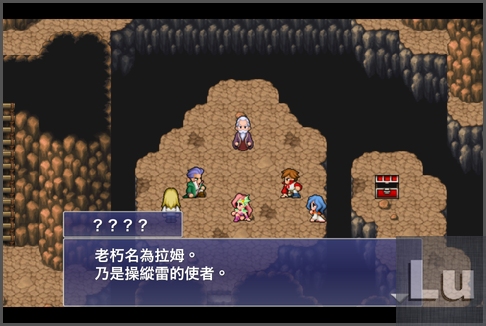
這邊可以看到拉姆大師已經老神在在的在等我們了 ( 是不是睡著了XDDDD
Chest: Cat Claws
You can see Ramuh stands there and waits for us. (Does he sleep?)
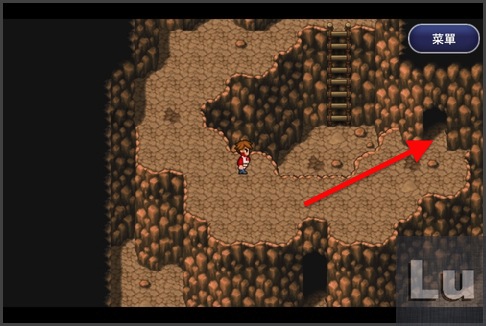
回到這邊就往最後一個定點進去
Back here and go to the last position.
雷鳴洞窟 B4 – 3 ( 儲存點、傳送點 )
Cave of Fulmination B4F-3 (Save point, Teleport)
–
進去前會有儲存點,還有一個傳送點可以選擇是否傳送直接離開洞窟,等一下收服拉姆之後,回到這裡就可以直接傳送出去,不用再走回去一次 ( 貼心 )
Before the last position, here is a Teleport you can be transmitted to outside. When we take Ramuh down, we can go back here and transmit. We don’t need to go the same road again. (So sweet…)
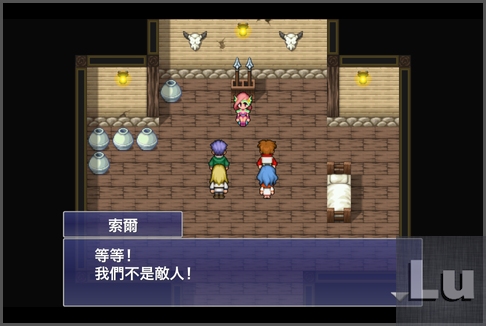
操縱雷的使者?那你跟「雷神索爾」( 咦?) 有什麼關係嗎?該不會是他爹….XDDDD
Lord of Thunder? Are you Thunder Thor’s friend? (Or his father…???)
BOSS 戰:拉姆 (Boss battle: Ramuh)
HP:約 8000 (HP: up to 8000)
弱點:無 (Weakness: None)
備註:減速可用 (Note: Slow works)
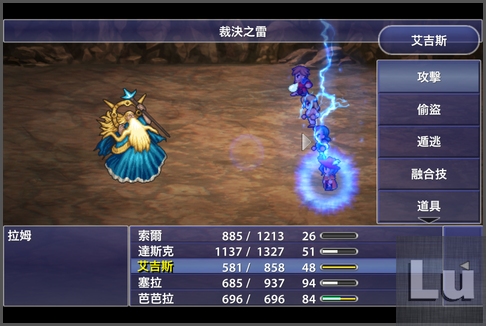
攻略:
勿使用任何雷電屬性攻擊,會被吸收,包含雷屬性武器 ( 例如閃雷棒 ),BOSS 有吃減速,既然如此,當然要給他減速一下。戰鬥過程大概可以用這些攻擊方式:
芭芭拉 – 跳躍、武僧 – 波動擊、赤魔法師 – 爆炎/冰凍/魔法爆彈2 ( 融合技 )、戰士 – 強擊、黑魔法師 – 爆炎/冰凍。拉姆的攻擊並不會太猛烈,比較強的「裁決之雷」大概傷害 270 ~ 280,注意回復就好。
–
Suggestion:
Don’t use any lightning attack. It will be absorb. (Including weapons with lightning. For example: Thunder Rod) You can use Slow magic. You can refer to the following way:
Barbara: Jump, Monk: Aurablast, Red Mage: Fira / Blizzara / Magic Bomb 2 (F-Ability), Warrior: Strike, Black Mage: Fira / Blizzara. Ramuh doesn’t deal too heavy attack to us. “Judgment Bolt” deals about 270~280 damage to all allies. Remember to restore.
–
戰鬥結束後即可取得召喚魔法「拉姆」。
After battle, you will acquire Summoning Spell: “Ramuh”.
–
–
高風之塔
Highwind Tower
–
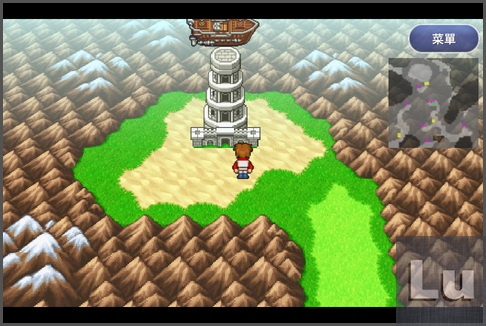
由飛龍棲息地再往上走一小段就會來到高風之塔,後面還有架飛空艇?
Go north from Dragon Roost, and you will arrive at Highwind Tower. You will see a Airship behind the tower.
事件:將「亞伯之槍」交給了芭芭拉,原本她還有敵意在,但畢竟是無知純真的少女,還是被這群冷笑的光之戰士給騙走了 ( 誤 ),走路一拐一拐的理查 ( 好慘XD ) 也出面相挺後,芭芭拉決定加入隊伍。
Event: Take “Abel’s Spear” to Barbara. And Ricard will come here. After his talking, Barbara joins the party.
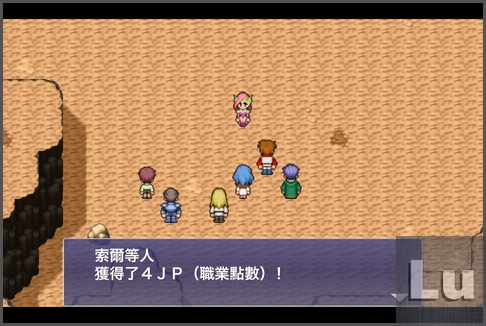
可喜可賀!職業點數 4 JP 入手
Congratulations! Get 4 JP
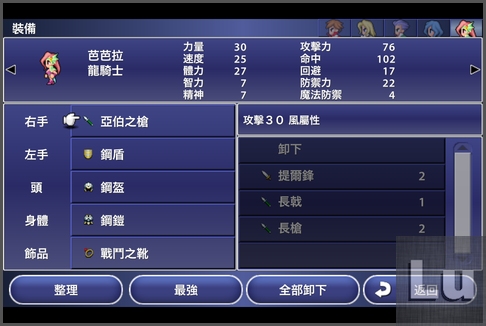
來看一下芭芭拉的預設裝備,還真不錯咧XD,裝備是可以卸下的,如果想要她的裝備,可以在最後的高風之塔 BOSS 戰前將它卸下,不過其實可有可無,自己決定就好。
Let’s take a look for Barbara’s initial equipments. It’s not bad right? Her equipments are all removable. You can remove them before the Boss battle in Highwind Tower. Actually just up to you.
高風之塔的敵人攻擊變化比較多,會放各式各樣的狀態魔法,打人也比較痛,如果沒有事先準備的話會很傷腦筋。( 前面在飛龍棲息地最後面有提到要先買一些道具,以備不時之需,如果忘了準備,可以再走回去買,反正很近。纏頭帶也別忘了裝備上 )
–
Enemies’ attack in Highwind Tower is very changeable. They use many kinds of Magic with Status. If you haven’t prepared you will be suffering. (I mentioned that you shall buy some items to prepare for contingencies. If you didn’t do that, you can go back to Dragon Roost. Don’t forget to equip Headband.
–
遇敵資訊:
Enemies’ information:
–
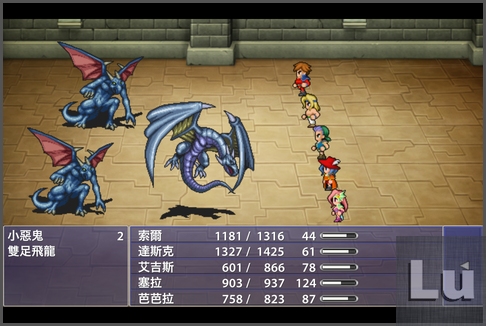
小惡鬼:HP 440,弱點 – 聖
攻擊:約 80~120
技能:沉默 ( 無法使用魔法 )、催眠
Lesser Demon: HP 440, Weakness: Holy
Attack: about 80~120
Skill: Silence, Sleep
雙足飛龍:HP 650,弱點 – 風
攻擊:約 180~200
技能:飛翼 ( 單體傷害約 250 )、火燄吐息 ( 全體傷害約 150 ~200 )
Wyvern: HP 650, Weakness: Wind
Attack: about 180~200
Skill: Wing (about 250 damage to a single target), Fire Breath (about 150~200 damage to all)
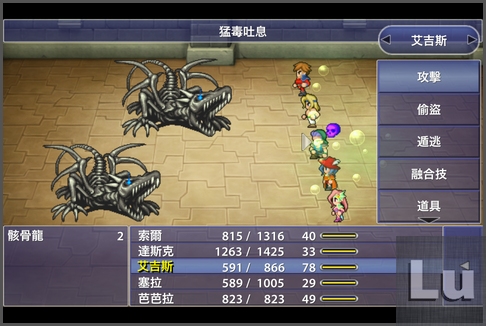
骸骨龍:HP 1111,弱點 – 火、聖
攻擊:約 230 ~ 250
技能:詛咒視線、猛毒吐息 ( 全體傷害約 70 + 中毒狀態 )
Bone Dragon: HP 1111, Weakness: Fire, Holy
Attack: about 230~250
Skill: Cursed Gaze, Venom Breath (deals about 70 damage with Poison)
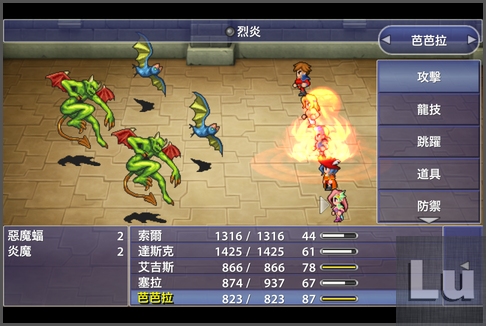
惡魔蝠:HP 330,弱點 – 火、風
攻擊:約 50~80
技能:「吸血」約 30~40
Evil Bat: HP 330, Weakness: Fire, Wind
Attack: about 50~80
Skill: “Bloodfeast”, deals about 30~40 damage
炎魔:HP 400,無弱點
攻擊:約 100 左右
技能:烈炎 ( 單體 / 全體約 200 )、混亂
Balrog: HP 400, Weakness: None
Attack: about 100
Skill: Fira – to single/all about 200 damage, Confuse
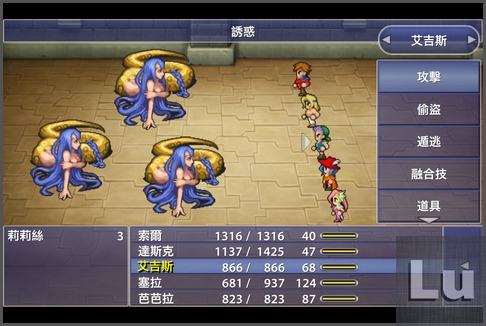
莉莉絲:HP 570,弱點 – 火
攻擊:約 100
技能:誘惑 ( 混亂狀態 )、束縛 ( 麻痹狀態 )、擁抱 ( 石化狀態 )
( 被石化可用金針解除,道具不夠的話 “小惡鬼” 身上可以偷到 )
Lilith: HP 570, Weakness: Fire
Attack: about 100
Skill: Entice (Confuse), Constrict (Paralysis), Embrace (Stone)
(Golden Needle can cure Stone status. If you don’t have it enough, you can steal it from Lesser Demon.)
–
–
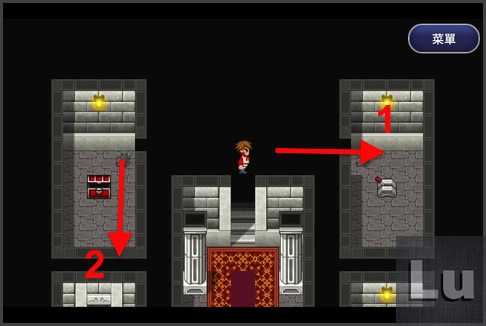
高風之塔 1F
Highwind Tower 1F
–
寶箱:白銀胸甲
路線:這邊的路線是這樣的。先往右 ( 開機關1 ) > 到左邊門內取寶箱 > 進入寶箱右側暗道 ( 開機關2 ) > 回去中間的門進入 ( 主線 )
Chest: Silver Hauberk
Route: Turn on the right switch > Take a chest at left > Go right-side to enter a passage (turn on the 2nd switch > Go back to the main door.
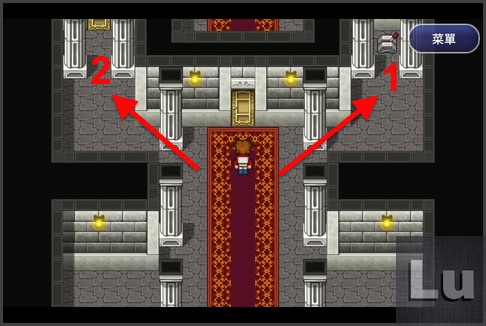
寶箱右邊暗道進入,在右側房間開了第二道開關後,中間的門就打開了
The right-side passage. Turn on the 2nd switch to open the main door.
–
–
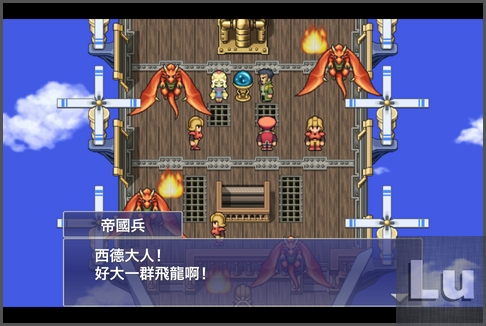
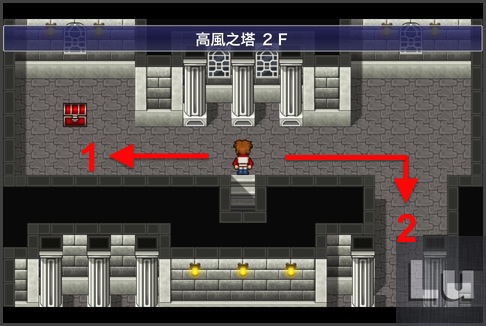
高風之塔 2F
Highwind Tower 2F
–
中途看到遠處的小事件,看來飛空艇上很熱鬧XDDD
See a small event. That is look like very lively…….
–
–
寶箱:高級恢復藥
路線:左 ( 寶箱 ) > 下 ( 主線 )
Chest: Hi-Potion
Route: Left (Chest) > Down (Main route)
–
–
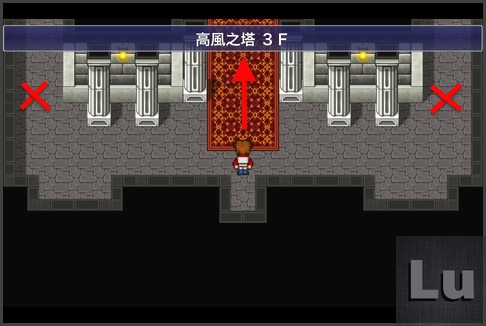
高風之塔 3F
Highwind Tower 3F
–
寶箱:金針
路線:直接往上走 ( 主線 ) 兩邊沒路不用走過去了
Chest: Golden Needle
Route: Go north directly (Main route). Left and right are both blind alley.
寶箱:金針
路線:右 ( 寶箱 ) > 左 ( 主線 )
Chest: Golden Needle
Route: Right (Chest) > Left (Main route)

–
–
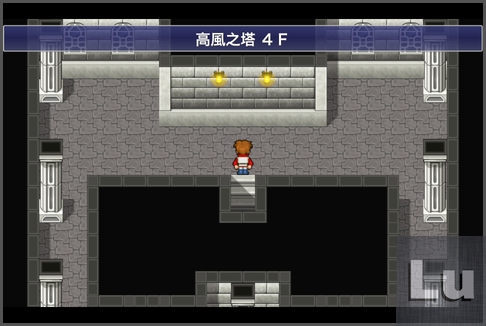
高風之塔 4F
Highwind tower 4F
–
寶箱:金針、巨劍
路線:兩邊都能往下走,是互通的
Chest: Golden Needle, Greatsword
Route: The left road is the same to right.
–
–
兩個房間都有寶箱,拿完就往下走
Take two chests in the rooms and go down-side.
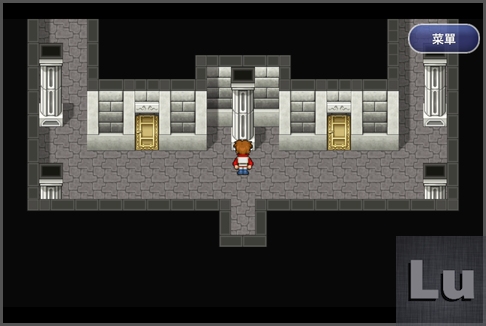
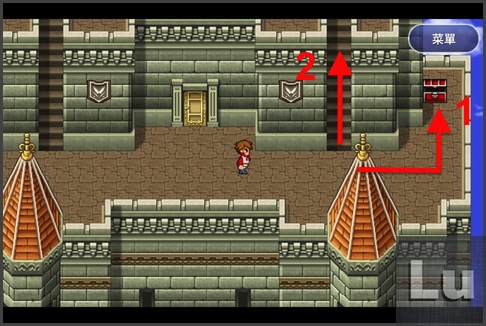
高風之塔 外部
Outside Highwind Tower
–
寶箱:魔術師長袍
路線:右 ( 寶箱 ) > 上 ( 主線 )
Chest: Magician’s Robe
Route: Right (Chest) > Up (Main route)
–
–
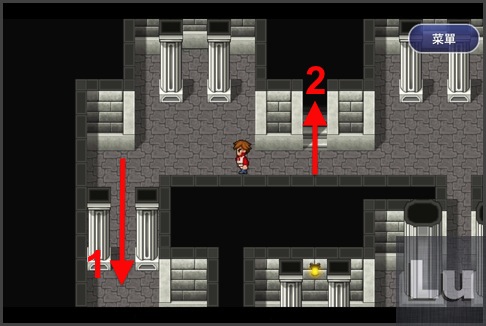
高風之塔 5F ( 儲存點 )
Highwind Tower 5F (Save point)
–
寶箱:魔術師之杖、山彥草
路線:右 ( 寶箱 ) > 左 ( 主線 )
Chest: Mage’s Staff, Echo Grass
Route: Right (Chest) > Left (Main route)
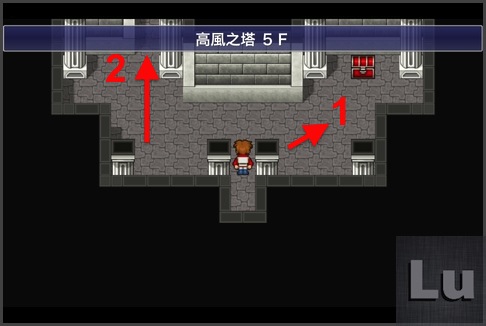
路線:下 ( 儲存點 ) > 上 ( 主線 )
Route: Down (Save point) > Up (Main route)
路線:左下 ( 寶箱 ) > 上 ( 主線 )
Route: Down-left (Chest) > Up (Main route)
–
–
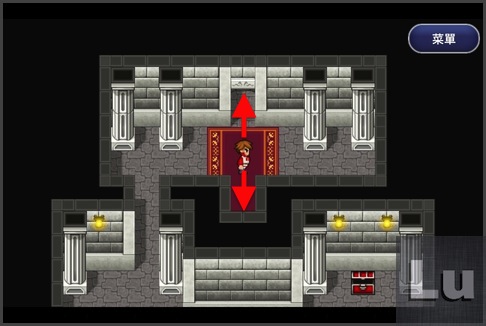
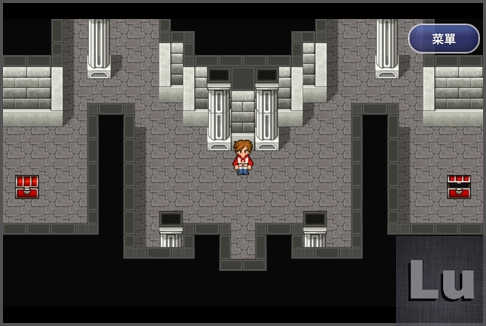
高風之塔 6F
Highwind Tower 6F
–
寶箱:高級恢復藥、乙太
路線:左右皆可 ( 兩邊各有一個寶箱 )
Chest: Hi-Potion, Ether
Route: Left or right (Chests at both side)
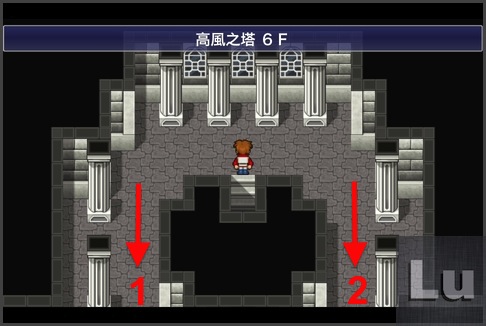
路線:往下 ( 主線 )
Route: Down (Main route)
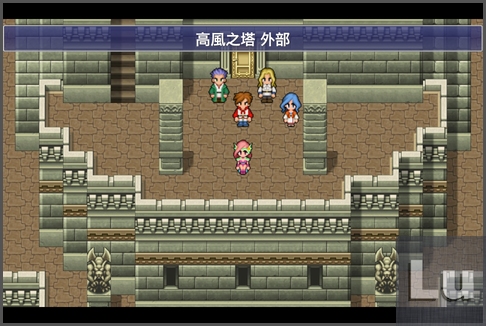
高風之塔 外部
Outside Highwind Tower
–
小事件,略過…
Small event, skip this…
–
–
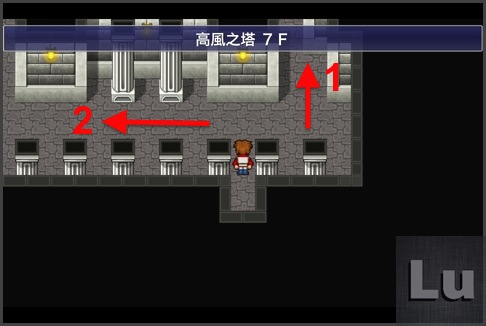
高風之塔 7F
Highwind Tower 7F
–
寶箱:三尖槍
路線:右 ( 寶箱 ) > 左 ( 主線 )
Chest: Trident
Route: Right (Chest) > Left (Main route)
–
–
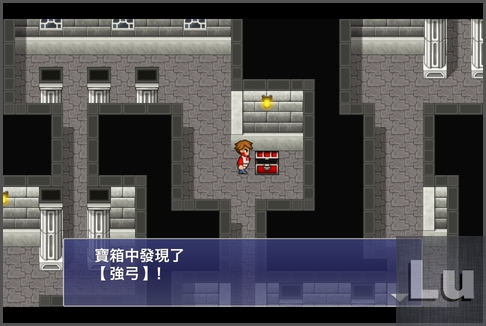
高風之塔 8F ( 儲存點 )
Highwind Tower 8F (Save point)
–
寶箱:強弓、帳篷
路線:主線路上 ( 寶箱 )
Chest: Great Bow, Tent
Route: on the Main route (Chest)
–
–
儲存點 ( 寶箱 )
Save point (Chest)

–
–
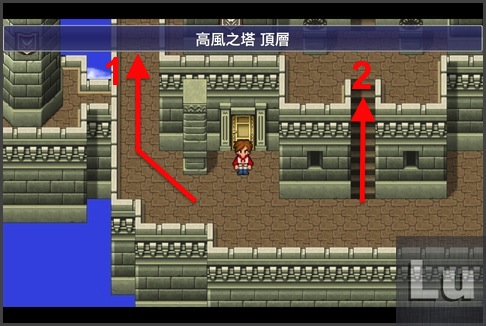
高風之塔 頂層
Highwind Tower Top Floor
–
寶箱:聖靈藥
路線:左 ( 寶箱 ) > 上 ( 主線 )
Chest: Elixir
Route: Left (Chest) > Up (Main route)
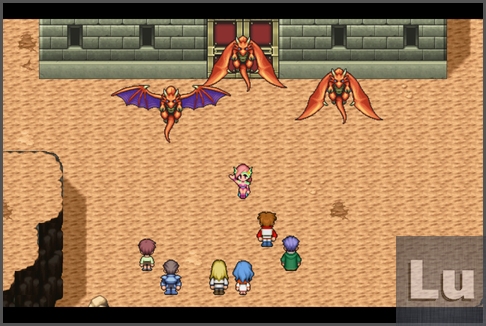
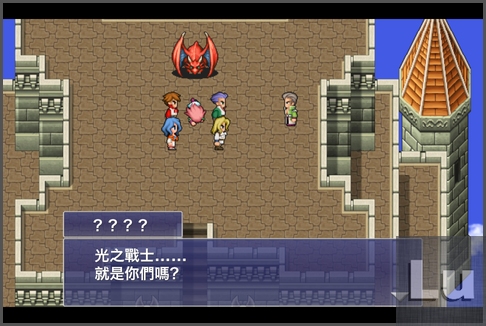
終於來到了塔頂,好漫長的路 …. 在塔頂只看到凱瑞斯趴在那邊,過去關心一下又開打是哪招?這龍怎麼就這麼沒人性啊 ( 咦? )
Finally we are on top floor. It’s a so far road. We see Ceres lying on top floor. Take care about him but confront a battle. Why does he do this….?
–
–
這時候芭芭拉跳了出來,開始親情 ( 應該算 ) 攻勢,終於也融化了凱端斯….
Then Barbara takes care to him.
–
–
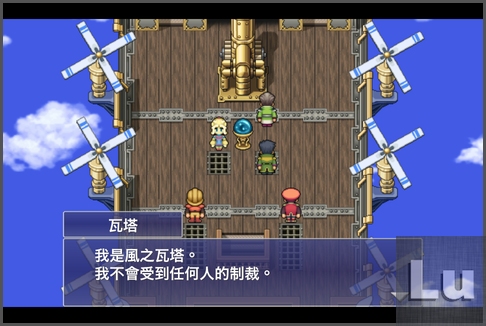
緊接著出現了不速之客!
Then it comes a stranger!
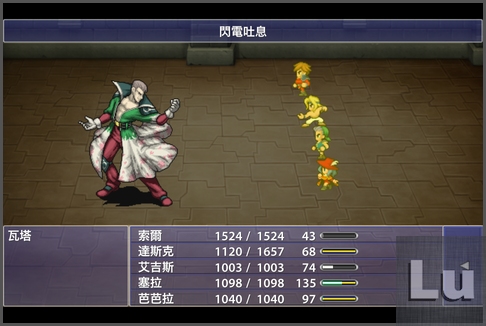
BOSS 戰:風之瓦塔 (Boss battle: Vata of the Wind)
HP:約 9000 (HP: up to 9000)
弱點:無 (Weakness: None)
備註:減速可用 (Note: Slow works)
物理攻擊:單體x2,每次約 200 (Physical attack: to a single, twice, once about 200)
特殊攻擊:風華萬丈 ( 單體約 300 )、褐染之風 ( 全體約 250 + 眩暈 + 失血 )、龍捲風 ( 單體瀕死 )
Skill: Howling Gale (single, about 300), Buffet (all, about 250, and Stun, Blooding), Tornado (single, Dying)
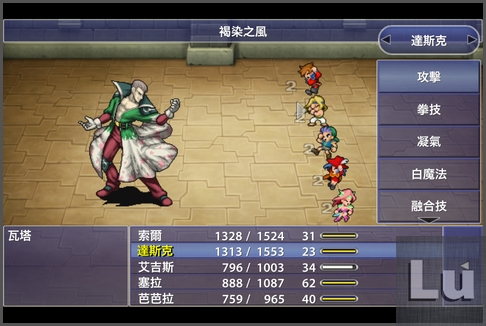
攻略:
瓦塔有吃減速魔法,別忘了先放一個。芭芭拉使用跳躍來閃避瓦塔的攻擊 ( 每次約 250 ),以及找機會放療傷吐息恢復全體 HP ( 每次回復約 260~280 )。戰士+武僧就用技能攻擊,像是強擊、波動擊這一類,如果主角有魔法爆彈 ( 治療 + 火炎 ) ,效果也不錯,也會有 250 左右的傷害。
–
Suggestion:
Don’t forget use Slow to Vata. Barbara use Jump (about 250 damage) to dodge Vata’s attack, and use Healing Breath to restore HP to all allies. (each time restore 260~280) Warrior and Monk use their skills such as Strike or Aurablast. If you have Magic Bomb, it attacksnot bad. (about 250 damage)
–
赤魔 or 黑魔 or 白魔就見機行事,看是要攻擊還是恢復均可。如果你是用赤魔,前面應該有機會學到魔法爆彈2 ( 救療 + 烈炎 ),效果也很不錯,每次攻擊有 450~480 的傷害。
–
Red, Black and White Mage play it by ear. You can attack or restore. If you have a Red Mage, you should have a chance to acquire “Magic Bomb 2” (Cura + Fira). It also attacks not bad. (about 450~480 damage)
–
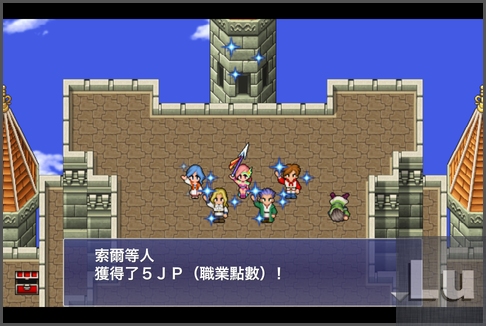
擊敗了瓦塔,接著芭芭拉開始回憶起過去的美好時光,亞伯之槍上的水晶發出光芒,眾人繼承了龍騎士之魂,獲得新職業「龍騎士」,並再取得 5 JP ( 職業點數 )!( 含淚 )
–
After Vata was defeated, Barbara remembers her wonderful memory. The Crystal in Abel’s Spear start glowing. The will of the Dragoons permeates our soul, so we acquire the “Dragoon” job and receive 5 JP!
BOSS 戰:風之瓦塔 第二回合 ( 強制結束 )
Boss battle: Vata of the Wind, Round 2 (Force Quit)
–
瓦塔搶到了水晶之力後又來了第二回合,這一次連跳躍、龍劍、閃電吐息都會了,不過打沒幾回合就閃人了,戰鬥會強制結束,純粹是來炫耀的 ……
–
When Vata snatched Crystal’s power, here comes round 2 battle. This time he can use Jump, Lancet, even the Thunder Breath! But he quickly leaves and the battle will be force quit.
飛空艇上到底還有什麼樣的事情要發生呢?
且讓我們繼續看下去….
–
Wanna know what happens on the Airship?
Let’s keep reading on….
( Back to Top)
–
–
第 2 章 光之世界 龍騎士篇 ( 完 )
Chapter 2-1: World of Light – The Dragoon (End)
–
by LuLu總裁
如需轉載,請說明出處,並附上本文連結,謝謝!
by President LuLu
For reposted elsewhere, please indicate the source,
and attach this link, thank you!
–
一起到 LuLu總裁 的 Facebook 專頁按個 讚 吧!
–
–
——————————————————————–
下一篇:( Next )
Chapter 2-2: World of Dark – The Ranger
上一篇:( Previous )
Chapter 1: Reckoning
–
本站相關連結:( Related Links)
Back to the Main Menu of FFD
[Subject] FFD: The list of F-Abilities (all 49 kinds)
[Subject] FFD: F-Abilities and battle against Omega Weapon (Max Level)
[Subject] FFD: Collecting Tails and the list of weapons in Omega’s room
參考資料:( Japanese wiki )
ファイナルファンタジー レジェンズ 光と闇の戦士 攻略wiki
–
![[招募] FF 攻略分享作者](https://www.hdlulu.com/wordpress/wp-content/uploads/2015/08/001.png "[招募] FF 攻略分享作者")
MASH
2012/10/12 at 08:17
天阿,我雷鳴洞窟沒去到,之後還可以去嗎?
MASH【引言】
LuLu總裁
2012/10/12 at 08:49
我文章裡面有寫到啊!一直到最後通關都可以再去,不用著急。
LuLu總裁【引言】
豆子
2012/10/13 at 21:06
@@ 某些地方會出現的特殊怪物,有什麼道具或是功用嗎?
像是在賽拉的故鄉,會出現一隻金龍
偷取 & 打死都的東西很一般,冏
豆子【引言】
LuLu總裁
2012/10/13 at 22:25
您好,金龍會掉落金色尾巴,但是機率「非常低」,我打了快兩個小時才終於出現,完全是機率問題,金色尾巴可以去和小人換超強武器,武器名字我忘了XDDD,換武器的尾巴一共有八種,分別從不同地點、不同的怪物身上「低機率」掉落,我之後會寫一篇關於尾巴的攻略專題,但目前還在寫主線的劇情攻略,所以要等等囉!
LuLu總裁【引言】
Zell
2013/03/14 at 20:38
lulu大大請問一下,魔法爆彈2這個融合技是要在一場戰鬥中有使用到救寮和烈炎才會生的出來嗎?意思是指要不斷使用這二種魔法才有嗎?
Zell【引言】
LuLu總裁
2013/03/15 at 01:08
融合技的習得條件:
1. 該角色同時可使用兩種必要的技能 ( 依各融合技不同 )
2. 在戰鬥中使用「其中一種」就有機會習得 ( 當然兩種都仍要裝備在身上 )
.
所以你可以持續在戰鬥中一直使用「救療」,直到出現「融合技」為止,
一直沒出現,也可以換換「烈炎」試試。
.
反正你只要身上裝備好學會該融合技的兩種必要技能,
在戰鬥中要用哪一個就用哪一個。
.
出現的機率是隨機的,有時候很快就學會,有時候打了 10 幾場還不出現,
不過這倒是比刷尾巴要容易很多。
LuLu總裁【引言】
ArthurL
2013/03/24 at 08:40
總裁您好
關奇美拉小弟幸運打贏了約10次
紅色尾巴~沒見過
但卻出現~小號的牙@_@
我記得地監的小人有提到 關於牙的 事情
@請教有關牙的相關資料有那些?
@那個可愛又令人生氣的小人又在哪?
謝謝您
ArthurL【引言】
LuLu總裁
2013/03/24 at 09:53
請看一下:最終章 – 上篇
https://www.hdlulu.com/wordpress/2012/11/01/ffd_chapter4_final_1/
( 在莫古力洞窟的介紹裡有說明 )
LuLu總裁【引言】
白〃
2013/04/15 at 10:38
剛剛打奇美拉不只會掉紅色尾巴也會掉小號的牙!
白〃【引言】
路人甲
2013/05/01 at 23:00
FFD的確不錯玩。但是對劇情的發展卻總是看不太懂…
像是從迪斯特洞窟出來後遇到飛龍襲擊,然後芭芭拉出現一下就結束戰鬥,重點是…主角們為何會知道它叫芭芭拉???到村莊後遇到老婆婆詢問是否認識芭芭拉?我根本就不認識阿= =
但是還是要選認識才能拿到重點道具…好奇怪阿@@?
再來就是劇情發展到飛龍草去救飛龍,但是主角群們為何會知道哪裡有飛龍需要飛龍草救治@@?
看到村民們說飛龍草在西邊森林…就跑去西邊森林??WHY???
拿到飛龍草後答應小男孩要救治飛龍,於是就跑到東南邊的飛龍谷去救飛龍,但是…主角群們怎麼知道這裡有飛龍需要飛龍草救治= =??
我看不懂啊 orz
路人甲【引言】
Roxanne
2013/06/04 at 09:31
whoah this weblog is wonderful i really like studying
your articles. Keep up the good work! You know, a lot of persons are searching around for
this information, you can aid them greatly.
Roxanne【引言】
Kz
2014/11/29 at 14:11
飛龍草地右上角的陸行鳥森林, 裡面有白陸行鳥,可以補MP~!!
Kz【引言】
Kz
2014/11/29 at 15:07
飛龍之谷 地圖7應該是特級乙太~!!
Kz【引言】
LuLu總裁
2014/12/03 at 22:20
感謝!不過也有可能是後來遊戲有小更新,對寶箱的內容更動過,這邊我寫攻略時應該確時是乙太沒錯,如果是變成特級乙太的話,我之後再修正一下XD
LuLu總裁【引言】